Rounds and Turns
Luthier's round: start of round, hidden worker planning, resolution in priority order, the Market, end of round, card tiers and searching.
Round overview
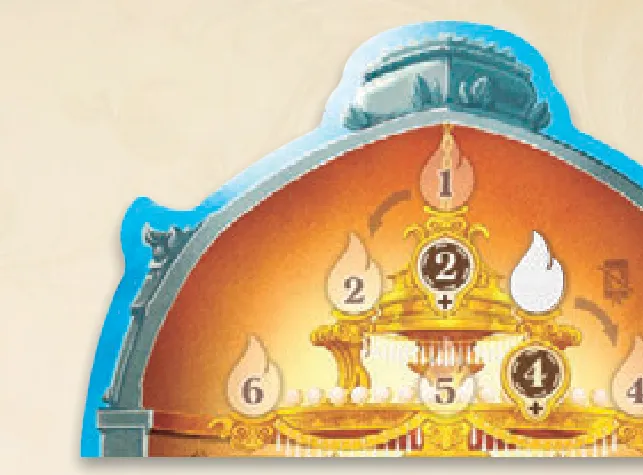
The game lasts six rounds, tracked on the  dome. Each round has four steps:
start of round, the Planning phase, the Resolution phase and end of round. After round 6 go
straight to final scoring.
Start of round
On your own workbench, in any order with the others:
- Take any start-of-round bonuses (noble and royal patron powers, the extra
storage award benefit…).
- Move the patience cube under each active patron one space right and take the
 gift
printed above its new space (see gifts and patience).
- Put up to two instrument cards from your hand on your
 roughing bench.
You may take instrument cards back from either bench into your hand at any time to make room; materials already spent roughing an instrument you pick up are lost.
Planning phase
In turn order, each player places exactly one  worker chip face down per turn
on a location space: one of the five main-board locations or one of the two benches on your own
workbench. Chips on the same space form a stack, newest on top. You may put several of your chips
on the same location (one per turn); each acts separately later. Continue until everyone has placed
all their chips.
Worker skill
A chip’s number is its skill. You start with #1, #3 and #5; #2 joins at the start of round 3
and #4 at round 5. Skill decides priority at a location and unlocks its
skill bonus —  on the main board,
 to
 on the benches.
Apprentices
When you place a chip you may put up to three  apprentices on it. Each adds 1 to
that chip’s skill for its action, then returns to the Market when that worker’s action is done. You
can never have more than three, counting those in your supply, those placed on chips and those
helping the action being resolved.
Resolution phase
Starting with the first player and passing the Resolution board around, each turn you either:
- activate a location where you have at least one chip — on the main board this resolves every player’s chips there; on a bench only your own; or
- go to the Market, once per round, moving your
 market cart to the right. It
takes your whole turn and needs no worker.
When you have no chips left and have been to the Market (or don’t want to), pass; you take no more turns this round. The phase ends when everyone has passed.
Priority order
To activate a main-board location, reveal its stack and lay the chips on the Resolution board, bottom chip first. Then reorder them:
- highest skill (chip + apprentices) acts first, whoever activated the location;
- equal skill: the chip placed first acts first;
- several chips of one player are separate workers, each in its own place in the order.
Each worker in turn takes one of the location’s actions. Then take the chip back (Balcony chips stay until the end of the round) and return its apprentices to the Market.
Alternate action: 2 money
Every worker must resolve. If you can’t or don’t want to take any of the location’s actions — on the main board or on a bench — take 2 money instead. On a main-board location you still get the 4+ bonus.
The Market
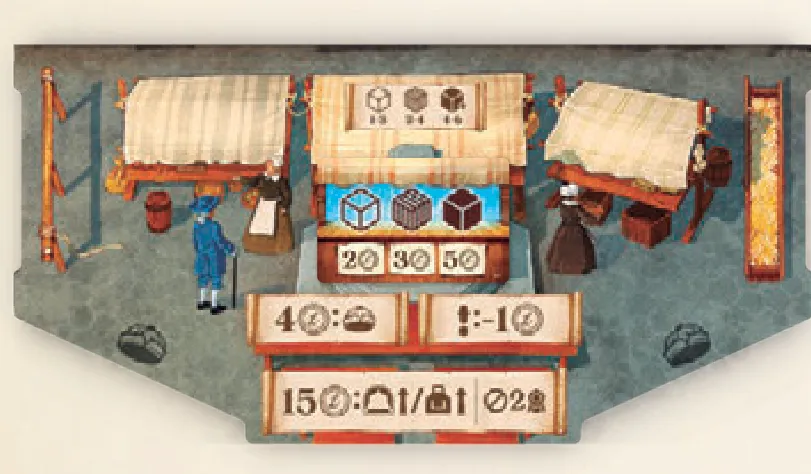
Prices are on the face-up market card; the board shows the range:  animal 1–3,
 wood 2–4,
 metal 4–6. On your visit you may, in any combination:
- buy any number of each material at the current price, into your storage;
- sell any number of each material at the same price — but never buy and sell the same material in one round;
- hire apprentices for 4 money each (up to your limit of three);
- train: move one step up the Performance or Craft Skill track for every 15 money (not onto the last, 2-prestige step).
Each  inspiration you spend takes 1 money off one item bought (one cube, one
apprentice or one training step). It never changes sell prices.
End of round
After round 6 skip this and score. Otherwise:
- Set the new turn order from the Balcony chips’ priority; players with no Balcony chip go behind, keeping their old order.
- Take back any chips still out.
- If you gained a specialty worker card this round, put one of your numbered chips on it for the rest of the game and take the matching specialty chip (specialty workers).
- Move every market cart back to the left.
- Discard the top market card to reveal new prices.
- Discard all face-up patron, instrument, performance and repair cards in tier I. At the end of round 3 also discard the Patron A cards left in the draw deck, so B patrons appear.
- Slide the cards in tiers II and III down into the free spaces and refill the empty spaces from the decks.
- Advance the round tracker. Reaching round 3 adds worker #2, round 5 adds #4.
Card displays and tiers
The Salon, Guild, Perform and Repair locations each show a row of face-up cards in three tiers.
- Tier I cards are free to take.
- Tier II and III cards cost 4 and 8 (any mix of money and inspiration) — free once your Reputation reaches the matching space.
- A taken card leaves a gap until the end of the round. Cards never refill mid-round.
Searching a deck
If your worker carries an apprentice, you may pay 10 (money and/or inspiration) to search that location’s deck instead of taking a face-up card: look only at the backs and take the first card of the instrument type, era or patron type you named. Keep the deck’s order. After the action, the apprentice is removed from the game. If the deck has no such card, shuffle the discards back in and keep searching.
Running out
An empty deck is rebuilt from its discards (Patron A and B discards may be mixed). Materials, inspiration, money and tokens are unlimited: use a multiplier card or a substitute.