Harvester Actions
Forestry's harvester actions in the forest: movement and river crossings, harvesting, reforestation and the reforestation table, tending the forest with forester tokens, forest buildings and water structures.
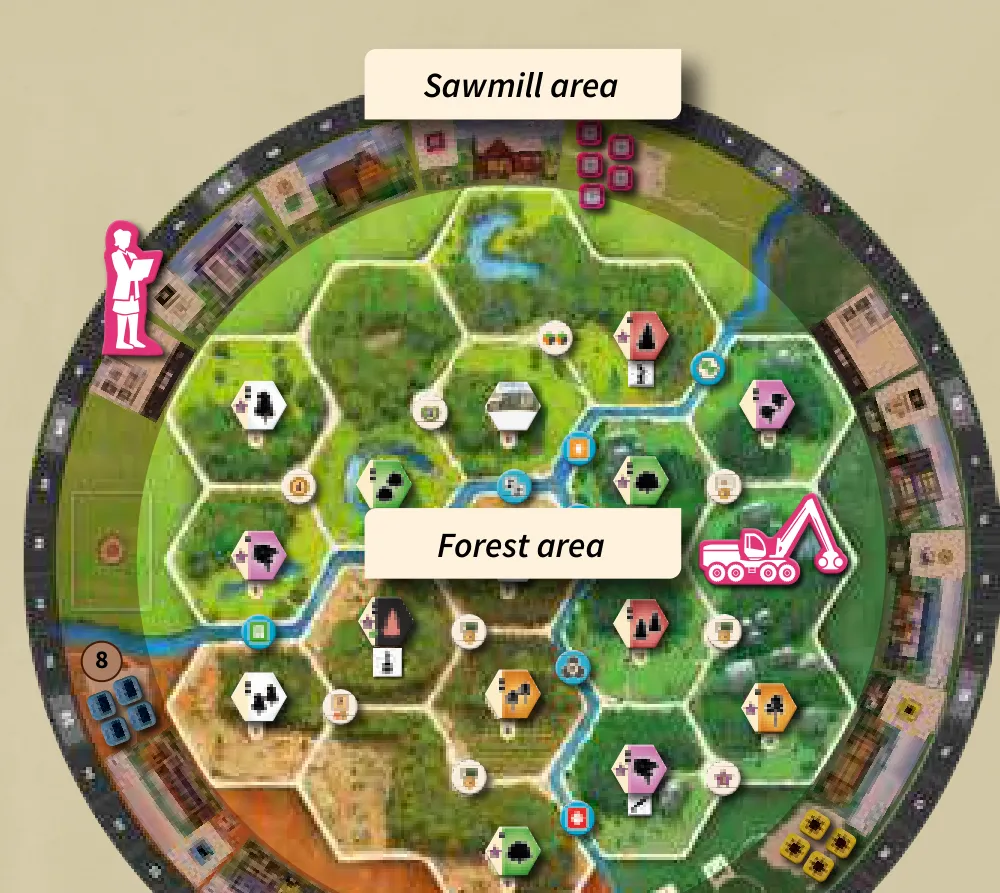
Your harvester works in the forest area: 15 hex spaces (4 of them double spaces), split by rivers into three areas — light green, dark green and orange. Every action here, except movement, happens on or next to the harvester’s space.
Movement
 For 1 action point your harvester moves up to 2 spaces.
- You may pass through a space with another harvester but never end there: one harvester per space. A double space counts as one space.
- Finish the move before any other action — no moving one space, acting, then moving on.
- Crossing a river costs 1 coin to the supply, each time — unless a reservoir with bridge spans it.
- Crossing a meander still costs 1 coin but gives 1 seedling — once per different meander in a move.
Harvest
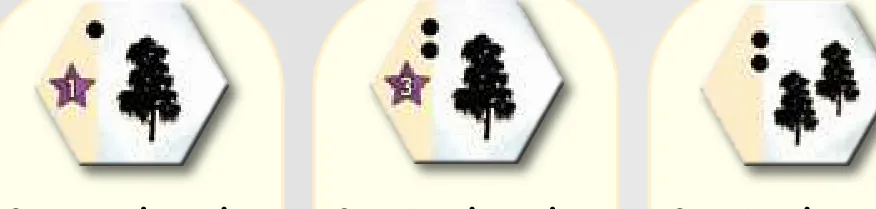
You may harvest only where the harvest token shows its colourful side.
- Pay 1 or 2 action points — the dots on the left of the harvest token.
- Take the wood token(s) shown from the supply and put each on a free storage space.
- If the token shows a star, gain that many
 stars.
- Flip the harvest token to its dark side.
| Harvest token | Cost | You gain |
|---|---|---|
| 1 dot, 1 star | 1 action point | 1 wood and 1 star |
| 2 dots, 3 stars | 2 action points | 1 wood and 3 stars |
| 2 dots, two trees | 2 action points | 2 wood |
Each species —  pine,
 birch,
 spruce,
 beech,
 oak — grows on three hexes, one of each kind.
Reforestation
You may reforest only where the harvest token shows its dark side.
- Pay 1 or 2 action points (the dots).
- If the token shows a star, gain those stars.
- Pay 1 or 2 seedlings (as shown on the token) and put them on your reforestation table, then gain the stars printed on the spaces they cover.
- Flip the harvest token to its colourful side.
Reforestation table
- Seedlings never go back to the supply. Put them in the column of the area you reforested (light green, dark green, orange), always from the top.
- Covered spaces give 2, 3 and 4 stars in the first, second and third rows.
- Filling a row gives its bonus: row 1 a technology upgrade, row 2 a step on the water
structures track, row 3
 6 VP.
- If that area’s column is already full, put the seedling below the table and gain 2 VP.
Tending the forest
There are three types of forester token:  paint protection,
 den tree
support and
 thinning. Usually three lie on the board.
- With your harvester on the token’s space, pay 1 action point.
- Put the token on your forestry table, in the topmost free space of a column. All tokens in a column must be the same type; two or three columns may hold the same type.
- Gain the reward printed on the space you covered. Filling a row gives the bonus at its right:
row 1 a technology upgrade, row 2 a step on the water structures track, row 3 6 VP.
If no column can take the token, put it below the reforestation table for 2 VP.
Replenishing forester tokens
At the start of each turn, check that the board has exactly 3 forester tokens. For each missing one, turn the top spawn card and put the missing type on the space with that number — several missing ones in the order on the card back: thinning, den tree, painting. If that space has a forester token or a harvester, try the next spaces in ascending order (after 15 comes 1). When the spawn deck runs out, shuffle all spawn cards into a new deck.
The most forester tokens score at the end (Final scoring).
Forest buildings
You have 6 building tokens, used for forest buildings and sawmill upgrades.
- Pay 1 action point,
 1 construction material and
 1 temp worker.
- Pick a clearing token next to your harvester’s space and replace it with your leftmost building token.
- Gain the clearing’s reward, then put the clearing back in the box — clearings are never replaced.
Each building used raises your end-game score on the buildings track. Your fifth building moves the water structures track up one step. Clearing rewards: Cards & Components.
Water structures
You own two: a meander and a reservoir with bridge.
- Pay 1 action point and 3 temp workers (meander) or 3 construction materials (reservoir with bridge), as shown on your board.
- Replace a river token next to your harvester’s space with the structure. Keep the river token — it scores at the end.
| Structure | Effect for every player |
|---|---|
 Reservoir with bridge | Crossing this river is free |
| Meander | Crossing still costs 1 coin, but gives 1 seedling (once per meander in a move) |
Water structures track
Your river tokens score their symbol × your multiplier, from 1× up to 5×. Move the cube up a step for each of these: filling row 2 of the forestry table, filling row 2 of the reforestation table, opening the third storage extension, and your fifth building.