Wear and Events
The eight Wear markers, speed penalties, the Event card and all 26 events.
Wear markers
Most Race cards and some Events put a Wear marker in the car’s holding box on the Team Sheet. Card Wear goes on after the car moves; Event Wear goes on at once. Every marker counts the same towards penalties — the colour only matters for pit stops and for Events that look for a type. There is no limit to the supply, and a car may hold several markers of one type. FAQ.
Temporary and permanent wear
| Marker | Kind and pit-stop rule |
|---|---|
 Black — Tires | Temporary; removed by a pit stop. |
 Gray — Body | Temporary; removed by a pit stop. |
 Blue — Suspension | Temporary; removed by a pit stop. |
 Green — Fuel | Temporary; removed by a pit stop. |
 Yellow — Suspension | Permanent; stays for the race. |
 Red — Serious Body | Permanent; stays for the race. |
 Lavender — Transmission | Permanent; stays for the race. |
 Orange — Engine | Permanent; stays for the race. |
Permanent markers stay for the whole race. Yellow suspension only comes from the Loose and Tight events, red body damage from crash events. If the temporary area is full, place more temporary Wear there; do not put it in the permanent area. FAQ.
Speed penalties
Count all the markers on a car — temporary and permanent — when it is activated:
| Markers | Effect on on-track speed |
|---|---|
| 0–2 | None |
| 3 | −3 MPs |
| 4 | −4 MPs |
| 5 | −5 MPs |
| 6 or more | Out at its next activation, if it still has 6+ Wear. FAQ. |
Speed never drops below 0, and the car still takes the card’s Wear. Only the active car is slowed — cars it drags along are not. A car leaving the pits uses pit exit speed and has no penalty.
Six markers and out
A car is not removed when it gets its 6th marker, but the next time its owner activates it. It then retires and takes the lowest Position marker left.
Event cards
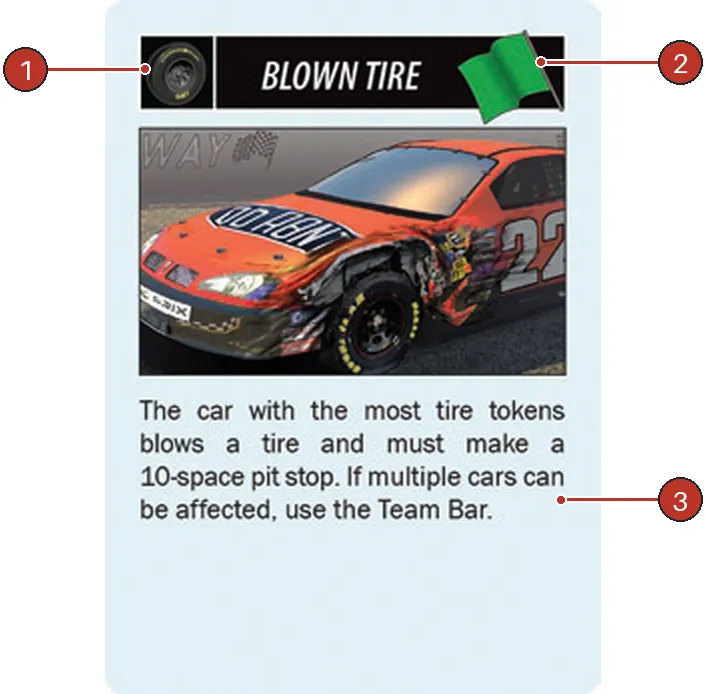
- Wear icon — the Wear type the event looks for.
- Flag icon —
 no restart,
 Yellow Flag restart.
- Event text — what happens.
After the last activation the First Player draws one Event card, reads it out and resolves it. No Event is drawn once any car has finished.
Which car an event hits
If no car qualifies, nothing happens. If cars of several teams qualify equally, turn up a Race card and use its Team Bar; the chosen team’s owner picks which of its cars is hit. A Wear icon on the card means the event only looks at cars with that Wear — no such car, no event.
Flags
Green: racing continues, pit stops are under green. Yellow: a caution — the field lines up for a Yellow Flag restart and pit stops are under yellow. Rain can end the race outright.
Event list
26 Event cards. “Most” means the most markers of that type; ties go to the Team Bar.
| Event card | Effect and restart |
|---|---|
| Blown Engine | One card. The car with the most markers retires; Yellow Flag restart. If no car meets the condition, no car is hit. FAQ. |
| Blown Tire ×2 | The car with most markers makes a 10-space pit stop. |
| Blown Transmission | One card. The car with most markers retires; Yellow Flag restart. |
| Brush the Wall | One card. A car at the outside wall takes 1 marker; the Yellow Flag icon means restart. FAQ. |
| Collision | One card. The Team Bar selects the origin team; it chooses the car, which and cars beside it or directly ahead/behind may take 2 each, at most one car per player. Diagonal cars are not adjacent; the group restarts at the back. FAQ, FAQ, FAQ. |
| Debris Caution ×3 | Caution only; Yellow Flag restart. |
| Engine Damage | One card. The car with most engine markers takes 1 more . |
| Front-End Damage | One card. The Team Bar chooses which eligible car takes damage; Yellow Flag restart. FAQ. |
| Fuel Miscalculation | One card. The car with most fuel markers takes 1 more . |
| Gear Box Damage | One card. The car with most transmission markers takes 1 more . |
| It’s Getting Worse | One card. The car with most blue plus yellow suspension markers takes 1 more . |
| Loose ×2 | The car with most blue suspension swaps one temporary for permanent . |
| Marbles ×2 | Each player gives 1 to their leading car. |
| Overcast | One card. Each player may remove 1 from one of their cars. |
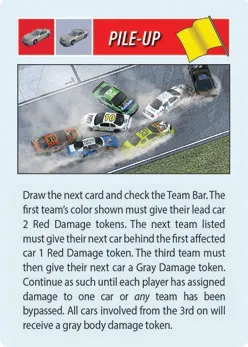
| Pileup | One card. Assign damage down the running order until each eligible team has assigned one car or is bypassed; cars need not be linked, and do not loop back for another pass. Yellow Flag restart. FAQ, FAQ. |
| Rain ×2 | Set aside the first Rain card; if another is drawn after at least one lap, the race ends. |
| Spinout | One card. The car with most tire markers drops back 10 MPs, moves to the inside lane and takes 1 ; if a team has several eligible cars, its owner chooses. FAQ. |
| Sun on the Track | One card. Each player puts 1 on one of their cars still racing. |
| Tight ×2 | The car with most blue suspension swaps one for permanent ; yellow suspension does not count toward the condition. FAQ. |