Teach the Game
Read-aloud script: team goal, the track, a turn, the finish, every way to score.
How you win
“We each run a stock-car team — three to six cars — in one race of two to four laps. Every car scores points for where it finishes, so the winner is the team with the best total, not the owner of the winning car. Cards move cars, and most cards move other people’s cars too.”
You need good finishing positions for all your cars, plus small bonuses for leading. You get them by playing Race cards that push and pull whole packs of cars, and by pitting before Wear slows you down.
The board
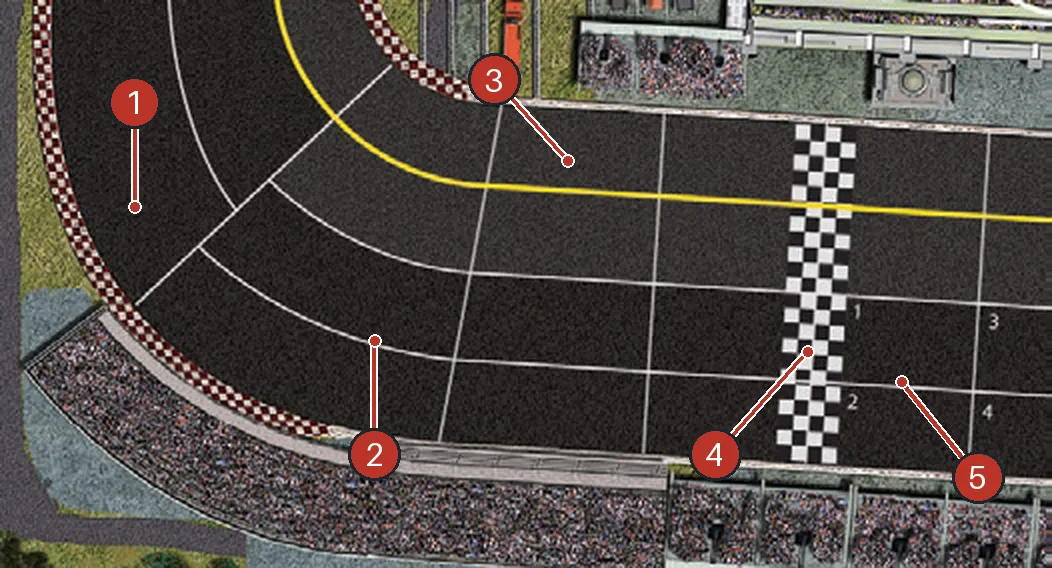
- Spaces — one car per space; a row across the track is a sector.
- Restart lanes — the darker lanes where the field lines up after a caution.
- The Apron — the inside pit lane; only pitting cars go there.
- Start/Finish line — crossing it moves the lap marker; the last crossing ends the race.
- Starting grid — numbered spaces where the race begins.
Each player also has a Team Sheet with a holding box per car for its  Turn Lead markers and its Wear (Team Sheet).
A turn
- Fill hands to cars you started with + 1 Race cards.
- Action segments, starting with the
 First Player and going left: pick one of your unflipped cars, play a Race card, move it, take the card’s Wear, flip the car. Repeat until every car has gone.
- End of turn: the leading car takes a Turn Leader marker → draw an Event card → everyone may pit → the leader’s owner becomes First Player → remove
 lapped cars → discard cards you don’t want.
Full sequence · How cards move cars
How the game ends
The first car to cross the Start/Finish line after the last lap wins the race. Finish the current action phase — no Event, no pit stops after that — then every car still on the track takes a Position marker by running order. Add up each team’s markers. Tie: the team with the car closest to 1st wins. Ending the race.
Ways to score
| Source | Points | When |
|---|---|---|
 Finish position | 1st 46, 2nd 42, 3rd 41, then 1 fewer per place (21st = 23) | Crossing the line, or by running order at the end |
| Retired, eliminated or lapped car | The lowest Position marker still left | The moment it leaves the race |
| Led at least one turn | +1 per car (not per marker) | End of race |
 Most turns led | +1 to the one car with the most Turn Leader markers (tie → better finish) | End of race |
What each resource is for
| Piece | How it works |
|---|---|
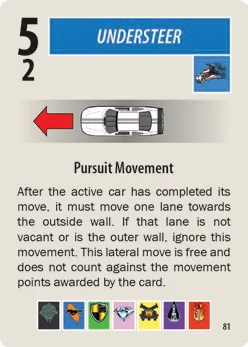 Race cards | Your only way to move. Refill to cars + 1 each turn; play one per car activation for its speed, movement type and Wear. Keep unplayed cards for later turns; discard only the ones you choose. FAQ. |
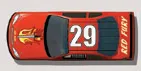 Cars | Each team has 6 / 5 / 4 / 3 by player count; activate each once per turn, then flip it. Cars are not permanently linked between turns; form links again during movement. FAQ. |
 Wear markers | From most Race cards and some Events; 3+ markers reduce speed by 3–5, while a car with 6+ retires at its next activation. Pit stops remove the four temporary kinds. You can collect repeats of a type, and extra temporary markers stay in the temporary area. FAQ, FAQ, FAQ. |
| Turn Leader markers | The leader at the end of a full turn gets one, including a new leader after green-flag pit stops. A car scores at most +1 for having any; the car with most markers gets +1 more, tied cars compare finish position. FAQ, FAQ, FAQ, FAQ. |
| First Player marker | The owner of the leading car becomes First Player next turn; flip the marker to show which of their cars still need to move. This passes by race leadership, not clockwise. FAQ. |
Teaching tips
- Say “team score” three times. One fast car with three wrecks loses to four steady finishes.
- Put four cars in a line and show Solo, Draft, Pursuit and Lead with the same card speed — the differences click at once. The linking chart is the cheat sheet.
- Point at the coloured box on each card: that is the Wear it costs. Orange and lavender never come off.
- First race: don’t agonize. Play, watch the pack move, and learn from it.
Rehearse an event with no target
Show an event that targets a particular kind of wear, while no car has that wear. Resolve it as a non-event: do not use the Team Bar to invent a target. The Team Bar resolves a tie between cars that actually qualify. Check the flag icon separately, then continue the end-of-turn sequence.
For the first movement demonstration, use the cars’ activation sides to distinguish ‘moved with the pack’ from ‘already activated this turn’.