Gameplay
The track, Team Sheet, sequence of play, running order, lapped and retired cars.
The track
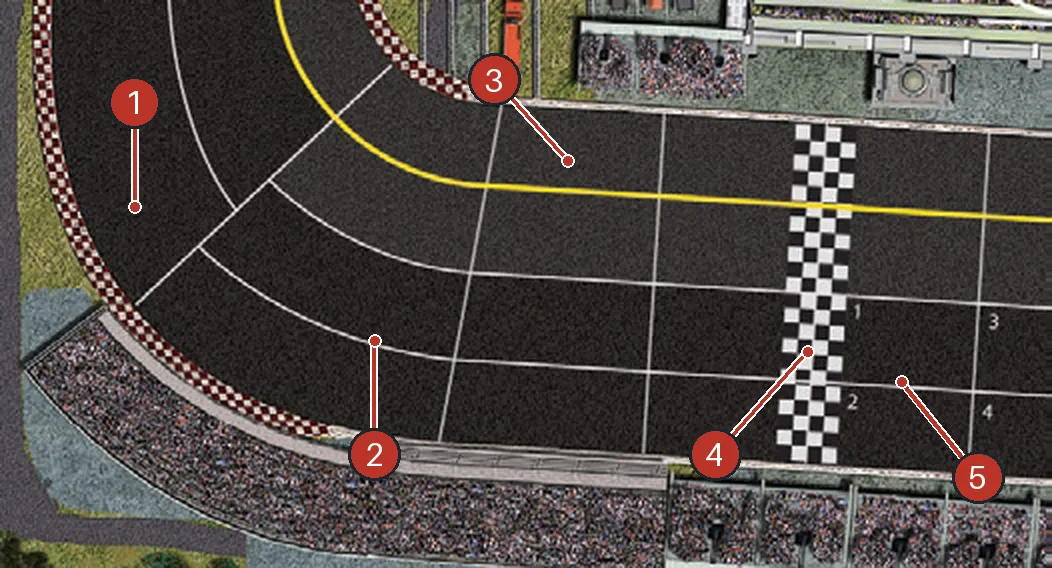
All four tracks use the same rules; they differ in size, shape and number of laps.
Spaces and sectors
Each rectangle is a space and holds one car. A row of spaces side by side, from the Apron to the outside wall, is a sector. In the same sector, the car nearer the inside counts as ahead.
Restart lanes
The darker lanes. After a Yellow Flag the leader goes on the innermost restart space of its sector and the field fills in behind it two by two. Yellow Flag restart.
The Apron
The yellow inside lane is pit road. Cars enter it only to pit. Several cars can share an Apron space: stack them, and the bottom car counts as ahead. A car on the Apron is behind every track car in its sector. Pit Stops.
Start/Finish line and laps
The lap count is printed on the track’s Lap Track. Each time the leader crosses the line, move the Current Lap marker up one. The first crossing at the start doesn’t count. When the leader crosses with no higher number left, the race ends. Ending the race.
The green restart line 8 spaces before the finish only matters for a restart on the last lap (Green Restart Line).
Starting grid
Spaces numbered 1–21 behind the line. Space 1 is the pole. All cars face the Start/Finish line and run that way all race.
The Team Sheet
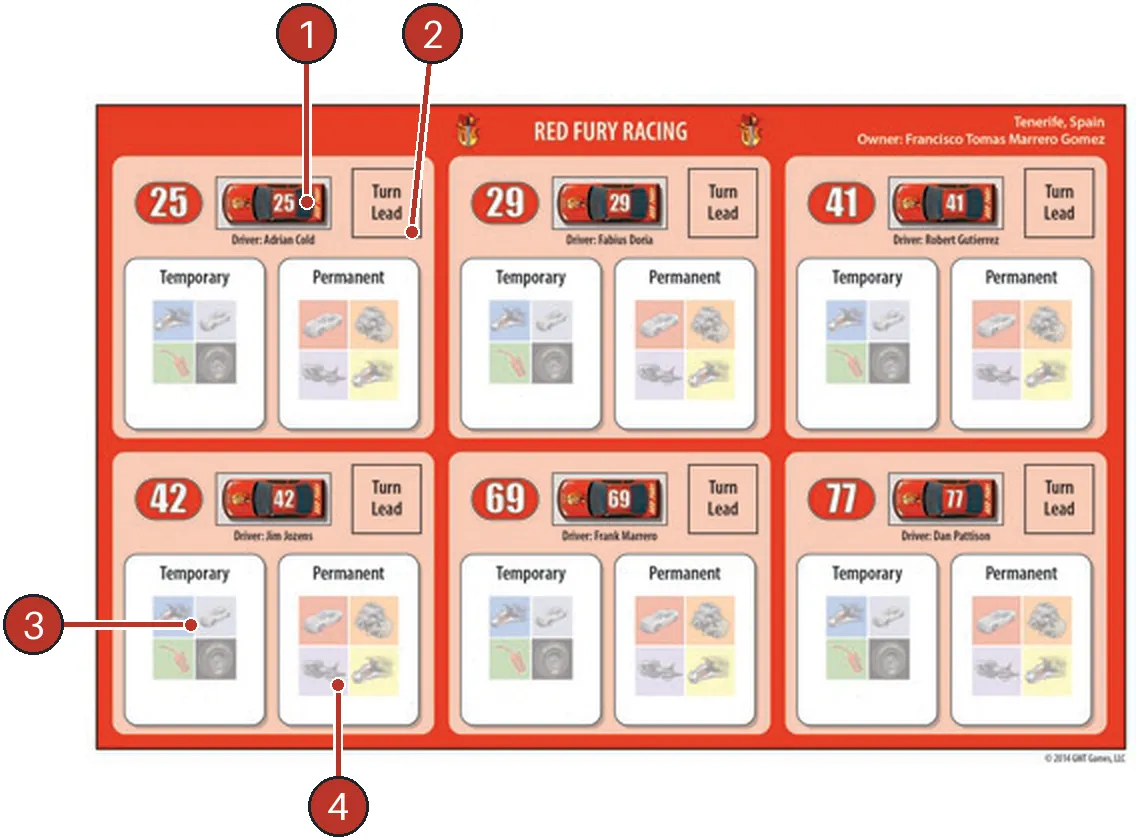
- Car — each car has its own holding box.
- Turn Lead box —
 markers this car earned.
- Temporary Wear — cleared by a pit stop.
- Permanent Wear — stays all race.
Cars and activation
Car counters are double-sided, light and dark. At the start of a turn every car shows the same side as the  First Player marker; flip each car when it has been activated. A car is activated once per turn.
Sequence of play
A turn = every player activates all their cars once. An action segment = one player activating one car.
Fill hands
Hand size = the number of cars each team started with + 1, and it never shrinks when you lose cars. The First Player draws first, then clockwise. Empty Race deck: shuffle the discards.
Action segments
The First Player goes first, then the player to the left, round and round until every car has been activated. On your segment:
- Choose one of your unflipped cars.
- Car already out of the race? That is a pass — flip it on your Team Sheet and you’re done.
- Car with 6 or more Wear markers? It retires now (Wear).
- You may retire it voluntarily: it takes the lowest Position marker left.
- Otherwise play a Race card and move. A car starting with 3+ Wear loses speed (Speed penalties).
- Add the card’s Wear marker to the car’s box (none for a white-titled card).
- Flip the car.
End of turn
- Turn Leader — the car with the Current Leader marker takes a Turn Leader marker. If several cars share the leading sector, they all get one.
- Event — the First Player draws and resolves an Event card (Events). Skip it if any car has finished.
- Pit stops — First Player first, then to the left (Pit Stops). A new leader after the pits also takes a Turn Leader marker.
- First Player — give the marker to the owner of the leading car and flip it to match the cars’ side.
- Remove lapped cars (Lapped cars).
- Discard any Race cards you don’t want.
Running order
The leader is the car with the most laps completed and the fewest sectors left to the line. Keep the Current Leader marker on it and move it whenever the lead changes. For every car: most laps → closest to the line → inside before outside in a sector. You only need the full order at the end of a turn, for lapped cars and at the finish. Once cars start finishing, the Current Leader marker goes to the car on the track closest to the line.
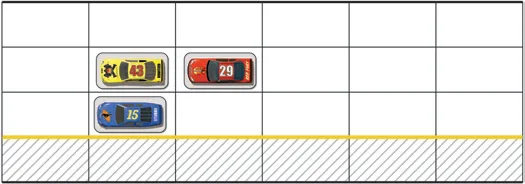
Cars #43 and #15 share the leading sector: both take a Turn Leader marker. #15 is on the inside, so it leads the running order and Blue is First Player.
Lapped cars
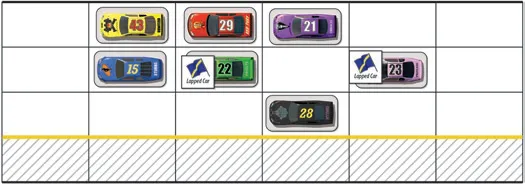
When the leader moves into the same sector as another car, that car is lapped: put a  Lap-down marker on it. If it gets back in front of the leader, remove the marker. A car still lapped at the end of the turn is removed and takes the lowest Position marker left (several at once: in running order, the last one gets the lowest).
Losing a car
A car leaves the race when it is lapped, collects 6 Wear, finishes, or you retire it. It goes on your Team Sheet with its Position marker. Each turn you may pass once for each car you have lost — and your hand size stays the same, so a smaller team holds better cards. That is intended.
The Team Bar
The strip of seven team colours at the bottom of every Race card. Use it to set the grid, to break ties and whenever a random team is needed: turn up the next Race card and read it left to right, skipping teams that aren’t racing or have no cars left. Once a team is picked, its owner chooses which of its qualifying cars is affected. Race card parts.
Corners
Corners have fewer lanes but no special rules: cars may change lanes, displace and pit there. Where lanes narrow (converging) or split (diverging), the active player chooses the lane. Packs of linked cars follow Drafting and corners.