Rounds and Worker Placement
The five rounds and their four phases, how and where workers are placed, Diary sections, placement penalties, Wax Seal requirements and the modifier icons.
Round structure
The game lasts five rounds. Each round has four phases, always in this order:
| Phase | What happens | Details |
|---|---|---|
| 1. Action | In turn order, each player places one worker and does that space’s actions, round and round until all workers are placed | Action phase |
| 2. Turn Order | Workers on the Turn Order space reorder the Turn Order track | Turn Order phase |
| 3. Reward | Correspondence majorities pay out, then the Beagle Goal tile is scored | Reward phase |
| 4. Cleanup | The Beagle moves on, workers return, Objectives and Academy refresh — skipped after round 5 | Cleanup phase |
Key concepts
- An action is done the moment its icon is activated.
- Anything you gain from one action can pay for the next action in the same turn.
- You may achieve Objectives and Crew cards whenever you meet them during your turn in the Action phase or during the Reward phase — so you can get actions outside your turn there.
 A Coin with a red number is a cost: whenever you do that action or cover that space, pay that many Coins to the supply.
Action phase
Players take turns in the order of the Turn Order track, leftmost first. On your turn you must place one worker from your personal board on an available space of the main board and then do its actions. When you have no workers left you pass for the rest of the phase. The others carry on until every worker is placed.
Worker placement
Diary sections
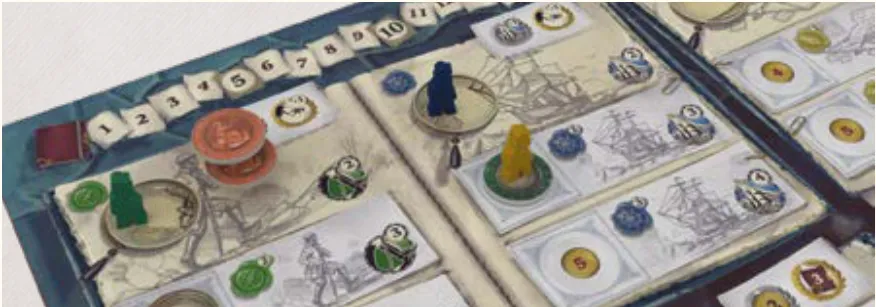
The main board has four Diaries: two Main Diaries (Exploration and Navigation, Correspondence and Academy), the Special Action Diary and the Small Diary.
- A red bookmark splits a Diary into two sections, one per page. It is printed only on the four-player side: with 1–3 players each Main Diary is one single section.
- The Special Action Diary is always one section; so is the Small Diary.
Placement penalty
The first worker placed in a Diary section, of any colour, is free. If the section already holds a worker — anyone’s, your own included — you pay a placement penalty. It does not grow with more workers:
| Players | Penalty |
|---|---|
| 1–2 | 3 Coins |
| 3–4 | 2 Coins |
Placement spaces
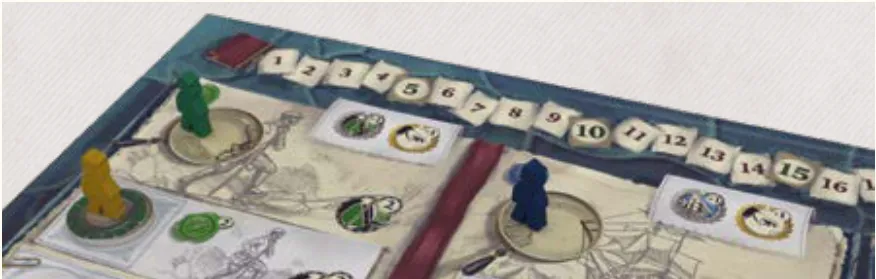
| Space | How many workers | Penalty |
|---|---|---|
 Circular magnifying glass (only inside Diaries) | Any number, several of one player | Yes, if the section is occupied |
 Square or rectangular magnifying glass (Museum, Turn Order, Objectives…) | Any number, several of one player | Never |
 Lens space — printed,  neutral or  personal Lens | One worker only | Yes, if the section is occupied |
A Lens space without a Lens token is locked: nobody can place a worker there until someone unlocks it. When you place a worker on another player’s personal Lens, that player takes 1 Coin from the supply. Your own Lens pays nothing.
Wax Seal requirements
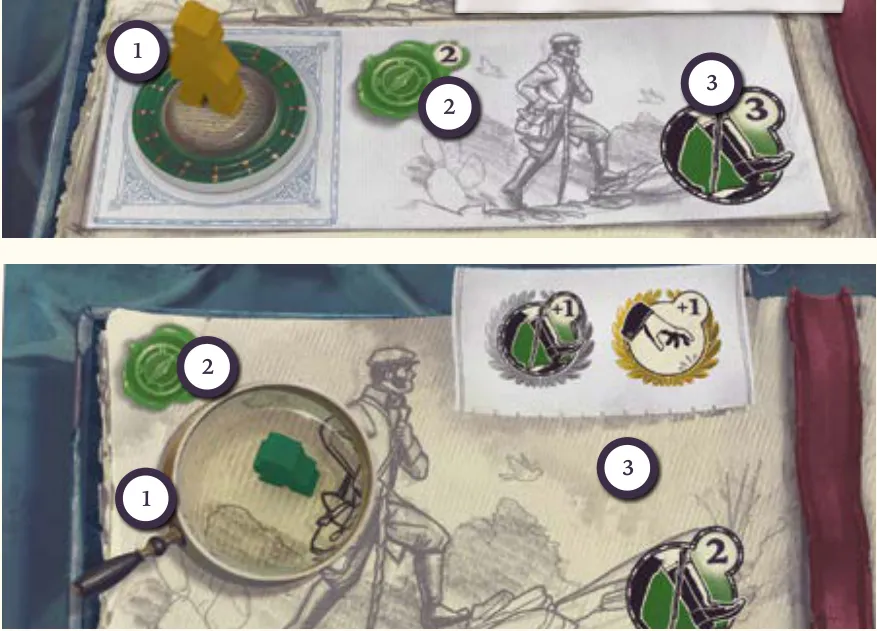
Most spaces show the Wax Seals the placed worker must have in its own row:  green,
 blue,
 yellow or
 red. A number beside a seal means you need that many of that colour. The order of the seals in the row does not matter.
- Each worker starts with one seal: the top worker has a printed
 purple seal (any colour) and no empty spaces; the other three have the seal from their Crew card and five empty spaces.
- Special Wax Seals count as any colour.
- Seals are never removed.
- The 5th worker never has seals.
Temporary Knowledge
 While placing a worker, you may return Temporary Knowledge tokens to the supply: each one counts as one seal of any colour for that placement. You start with one. They never count for Objectives or Crew cards.
Perform the actions
After placing and paying, do all the actions shown at that space, in any order. You may skip any of them. A worker with a silver or golden distinction also gets the distinction bonus of that Diary section.
Modifier icons
A small icon in the top-right corner of an action changes it.
| Icon | Meaning |
|---|---|
 | Do the action this many times |
 | Total discount on that action |
 | Pay no Coins for any step of the action |
 | Do a previously played action again |
 | The effect lasts for the rest of the game |
 | Gained at final scoring |
 | Do it or apply it at once |
 | Take the reward of one island where you have an Explorer |
Turn Order phase
If any workers are on the Reserve Turn Order space, the player whose worker is furthest left there moves their Turn Order marker to position 1, and so on: the markers follow the order of those workers. Players without a worker there keep their relative order behind them. With no workers there, the order does not change.
Cleanup phase
Skip it after round 5 and go to final scoring. Otherwise:
- Move the HMS Beagle along the Ocean track to the next Beagle Goal position.
- All workers return to their personal boards.
- Remove the Objectives still on display and reveal 2 new silver and 2 new golden ones.
- Remove every Wax Seal on the top Academy Scroll (out of the game). Slide the remaining seals up so no empty space sits above a seal, then fill the empty spaces from the pile.
The main board
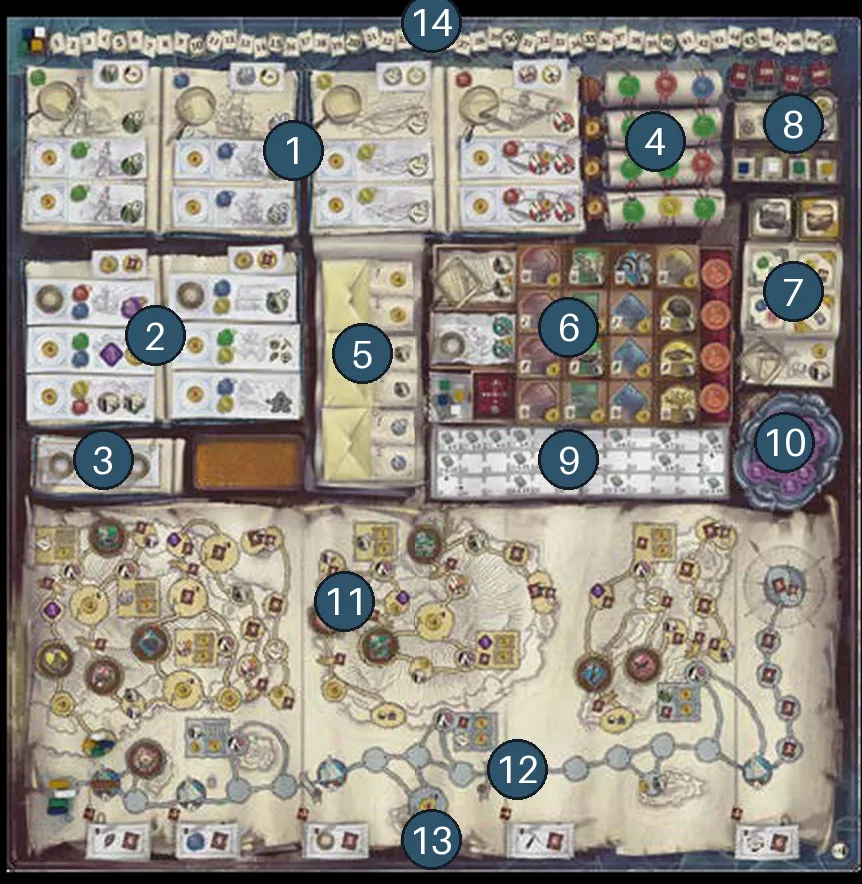
- Main Diaries — Exploration, Navigation, Correspondence and Academy
- Special Action Diary
- Small Diary
- Academy Scrolls
- Envelopes
- Museum display
- Objective display
- Turn Order track
- Theory of Evolution track
- Silver plate
- Island tracks
- Ocean track
- Beagle Goal tiles
- Victory point track