Cards & Components
Every card, tile and token in the base game, Fireland, Oceania and Komodo Dragon, with its picture and what it does.
Every card and tile with what it does, in Ludex’s words. Card and tile pictures come from the Darwin’s Journey Complete Tile and Card Reference on BoardGameGeek; components (and all Oceania pictures) from the publisher’s rulebooks. The base-game and Fireland Crew faces come from Darwin’s Journey [Complete]. Art © ThunderGryph Games.
Boards
Components
| Component |
|---|
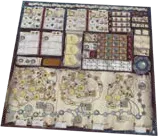 | Main board. Two sides: 1–3 players and 4 players (red bookmarks split the Main Diaries). With 1–3 players, each whole Main Diary is one section; unlock its spaces top to bottom. On map spaces marked for higher player counts, movement still uses the space, but take the printed bonus instead of a specimen. The Reward phase follows turn-order changes, so new order breaks its ties (Diary sections, unlock order, map spaces, Reward timing). |
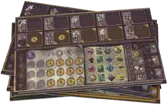 | Personal board (×4). Worker rows, Objective rows, specimens, Tents and Stamps; Alfred on the back. Objective reserve spaces hold any two colours. If full, put the new tile directly into an empty matching space and pay its cost; you cannot rearrange a tile already in reserve (FAQ). The Gain Objective space still pays its printed 2 Coins even if the display is empty (FAQ) |
 | Workers (5 per player). Four in play from the start; the fifth joins through the leftmost golden Objective space. If your Diary section already has a worker, including your own, you may use another free Lens space but must pay the placement penalty first; distinction bonuses are based on the worker’s seals when it was placed. FAQ FAQ FAQ FAQ FAQ |
 | Explorers (3 per player). One starts on the first island; more arrive when your Ship crosses silver banners. Exploration and Navigation must move at least one space. The final track space is one space, and only the first Explorer or Ship to arrive there scores the 3-point bonus. Research Island lets you research one specimen on any island where you have an Explorer, anywhere on its track (FAQ, research anywhere, track end). FAQ FAQ FAQ |
 | Ship (1 per player). Sails the Ocean track behind or ahead of the HMS Beagle. Move up to the Beagle only forward; any silver banners crossed on the way still trigger. The final space is one step and its 3 points go to the first arrival (FAQ, track end). |
 | Tents (5 per player). Placed on campsites; each frees the action beside it on your board; all 5 placed = 5 points. A campsite holds one Tent per player and a placed Tent never moves. You may stop even if you cannot yet afford it: take optional campsite rewards in an order that lets you pay this turn, but you cannot return to pay later. Reactivating a Tent gives that campsite’s actions for free, not the personal-board bonus; a slash means choose one (FAQ, moving Tents, cost, reactivation). Each campsite holds only one of your Tents, and placed Tents cannot move. Campsite rewards are optional and may be taken in an order that lets you pay from another reward that turn; you cannot pay later (, , ). |
 | Stamps (12 per player). Three stacks of 4; placed on Envelopes for Correspondence majorities. FAQ |
 | Cubes (4 per player). Mark victory points, Theory of Evolution, Turn Order and 50+; Evolution steps beyond the last space are lost (FAQ). |
 | Personal Lens tokens (6 per player). Unlock locked spaces; others using them pay you 1 Coin from the supply. The printed Lens beside the Museum is open from round one; unlocking a space with your Lens does not give a worker distinction bonus (FAQ, distinction bonus). |
 | Neutral Lens tokens (2). Unlock the two top Special Action tiles from the start. |
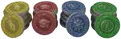 | Regular Wax Seals (56). 14 each of yellow, red, blue and green; bought at the Academy. Each seal purchase is a separate Academy action, so you may resolve a Crew card between purchases. Apply a discount to the Scroll and board-space cost together for that one purchase; it cannot carry to another seal. A red X makes the whole purchase free, including its board-space cost (separate actions, Crew between actions, discount, red X). Removed seals leave the game, and an empty supply stays empty (FAQ). |
 | Special Wax Seals (12). Purple: any colour for placement and Crew cards. |
 | Temporary Knowledge tokens (16). Spent while placing a worker as one seal of any colour; 1 point each at the end. |
 | Research tokens (30). Mark specimens researched on your board; they stay after delivery and are not limited, so use a substitute if the supply runs out. A token can mark a specimen already in the Museum to meet Objective or Beagle Goal requirements, but only Repeat Delivery lets you deliver it again (after delivery, purpose, supply). |
 | Specimen tokens (16). On the flag spaces of the tracks; leftovers start in the Museum. FAQ FAQ FAQ |
 | Museum tiles (16). Placed in the Museum display when a specimen is delivered. At game end, score 2 points plus 1 per completed row, then multiply by your Evolution books (FAQ). FAQ |
 | Coins (40). 28 of value 1 and 12 of value 5. |
 | HMS Beagle token. Moves to the next Beagle Goal at each Cleanup. |
 | 2-player Turn Order Action token. Covers the Turn Order Coin reward at 2 players (3 Coins); covers the track in solo. Any number of your workers may take that space without a placement penalty, and each earns the Coins. FAQ FAQ FAQ |
 | Player aid. Icons and tile reference. |
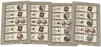 | Alfred Action cards (8). Solo: Alfred’s action options, top to bottom. He researches every specimen passed; each card’s two actions are the landing space and the one just before it. Resolve his bonus actions between those actions, then use the topmost eligible locked space when a card unlocks one (research, bonus timing, unlock order). |
 | Alfred Bonus Track cards (8). Solo: actions on the 5th and 10th spaces of Alfred’s Bonus track, by round. FAQ FAQ |
Cards
Crew cards
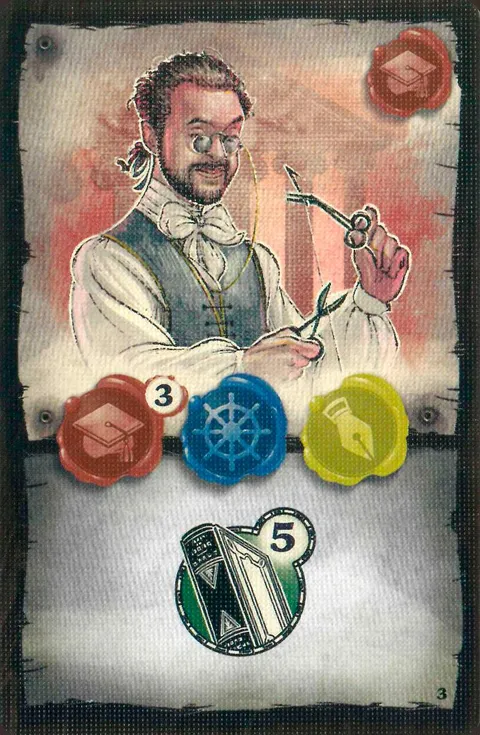
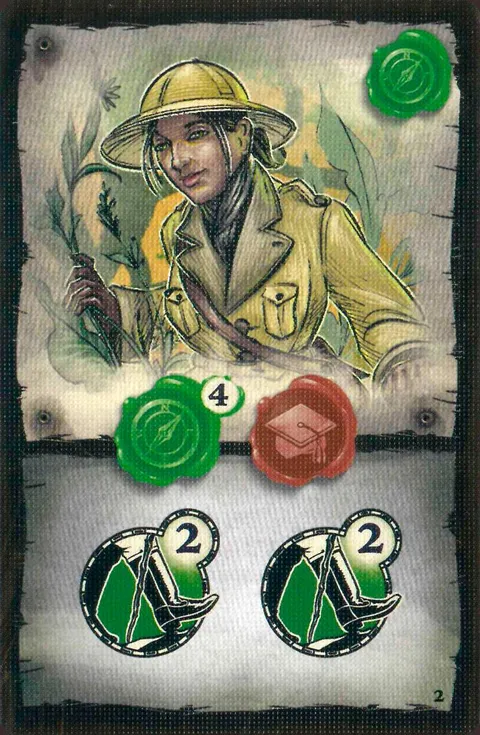
Three per player. The seal in the top-right corner is your starting seal; the seals in the middle are what one worker needs to achieve the card; the bottom is its reward (Crew cards). A starting seal only sets up the worker: after setup, it is not attached to that worker, so a yellow start does not qualify it to Explore (FAQ).
| Reward when achieved |
|---|
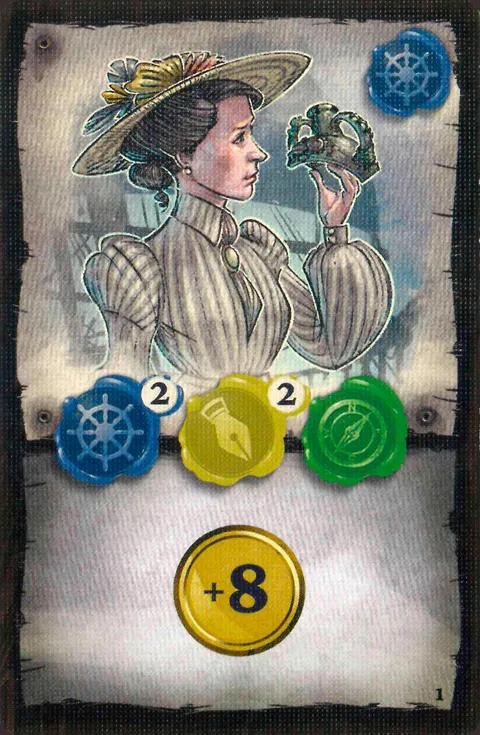 | 1. Gain 8 Coins. |
 | 2. Up to two separate Exploration 2 actions; each may use the same or a different Explorer (FAQ). |
 | 3. Advance your Evolution marker 5 steps. |
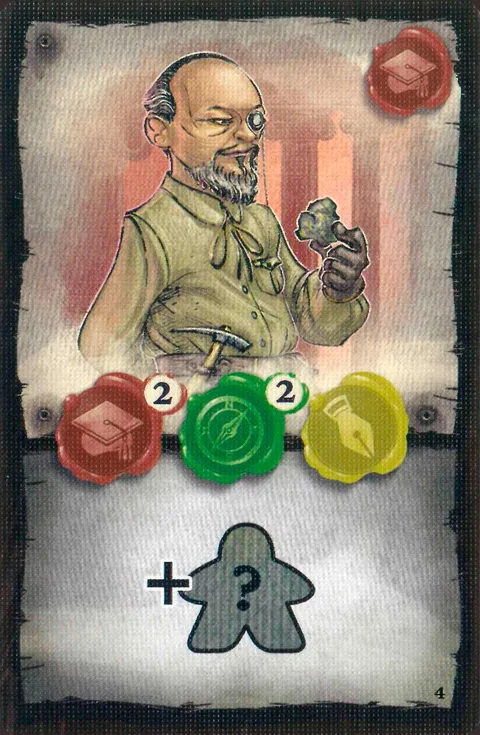 | 4. Place an unused Explorer at the start of an island where you have none. |
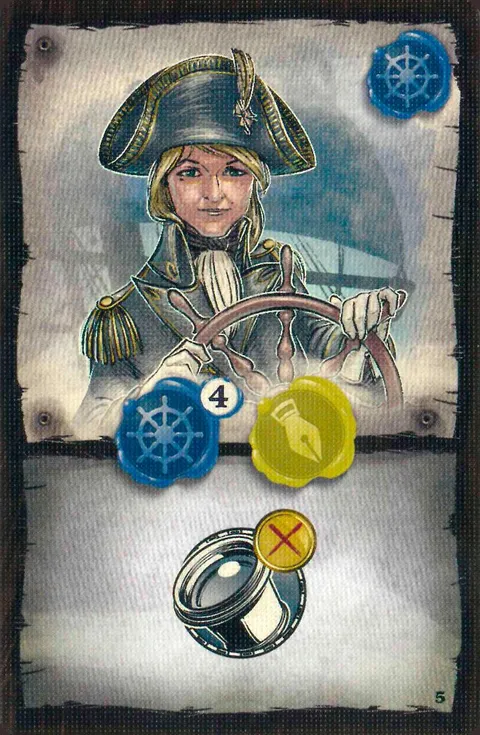 | 5. Unlock a Lens location without paying its Coins. |
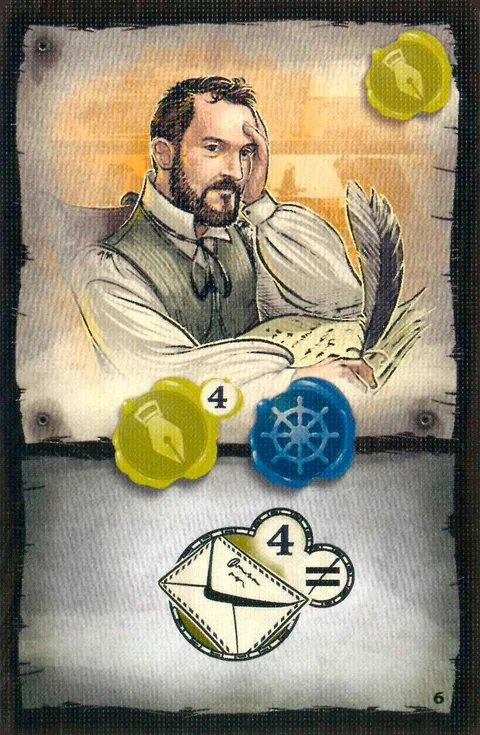 | 6. Place up to 4 Stamps on any Envelopes. |
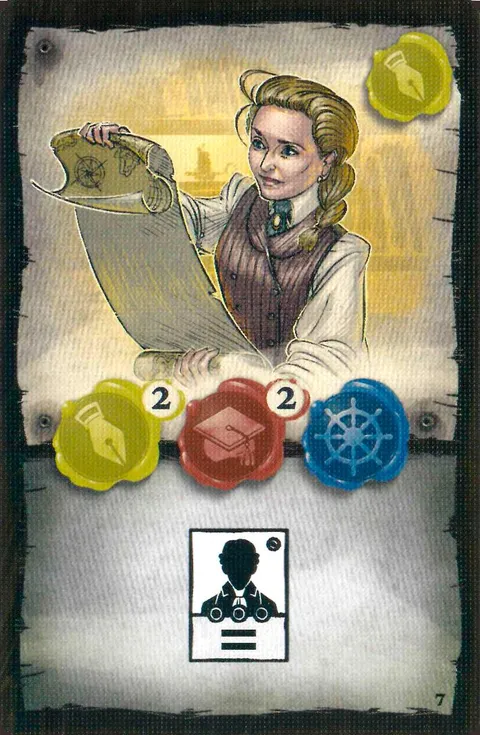 | 7. Do the actions of any unachieved Crew card in play. |
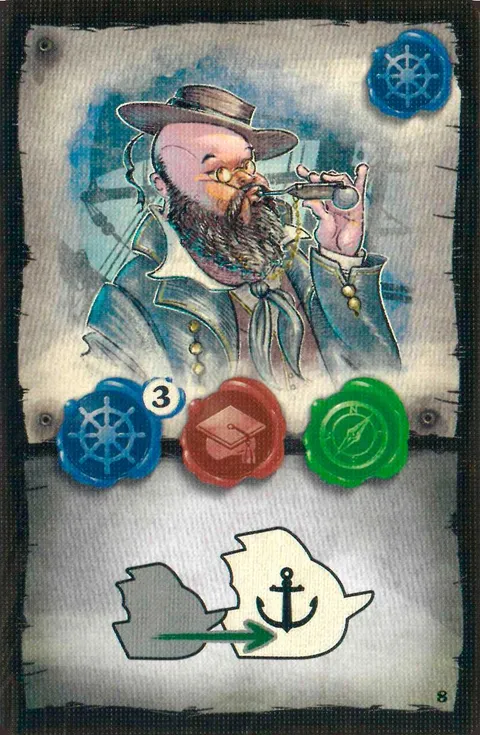 | 8. Move your Ship forward to the Beagle if it is ahead; trigger silver banners crossed along the way. If level with or ahead, stay put (FAQ). |
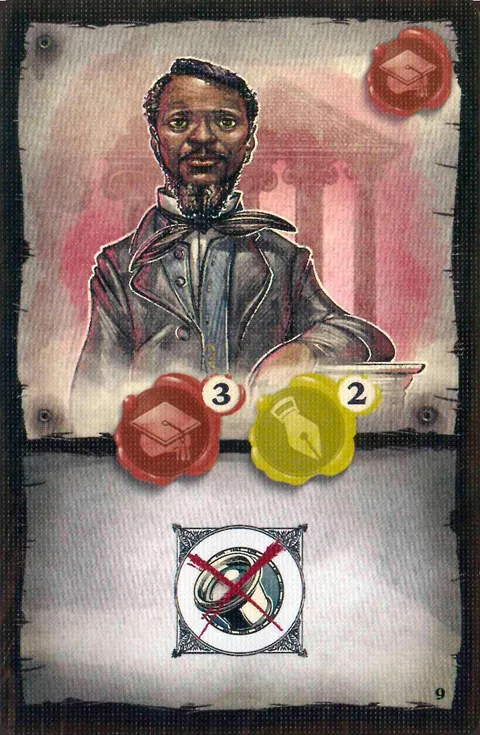 | 9. Do all the actions of a locked space. |
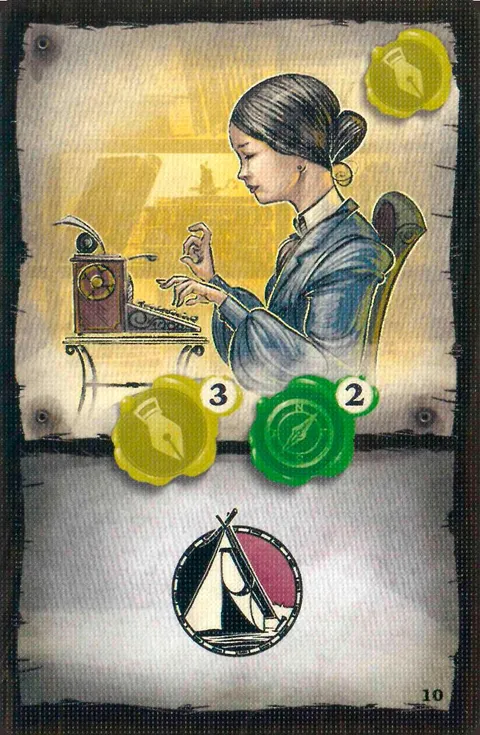 | 10. Put your next Tent on any open campsite, paying its cost, and take its rewards. |
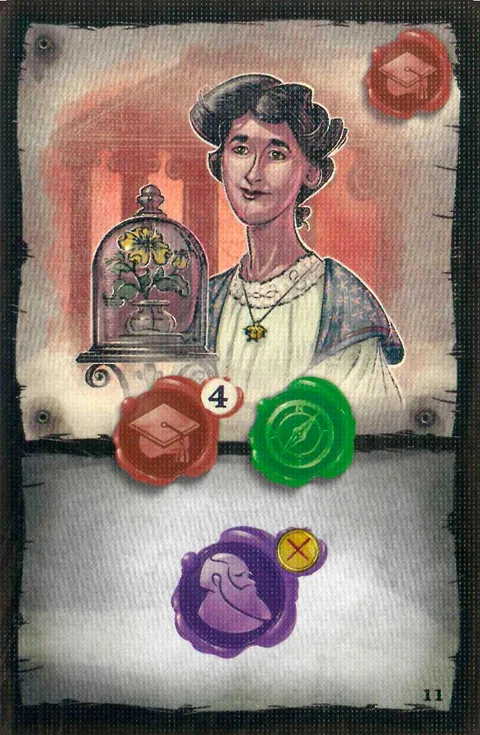 | 11. Put a Special Wax Seal on the leftmost open space of a worker row, free. |
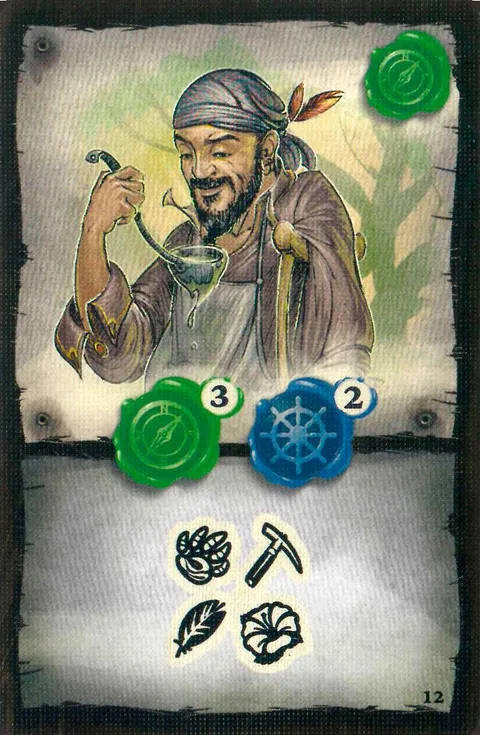 | 12. Research any specimen you do not have yet. |
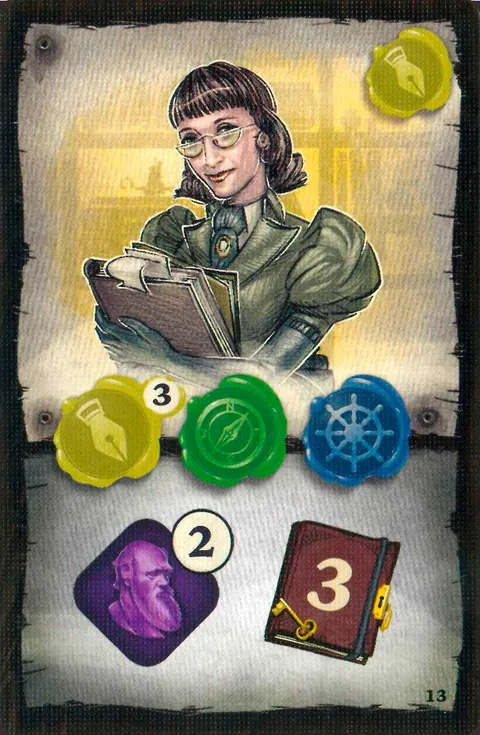 | 13. Gain 2 Temporary Knowledge and 3 victory points. |
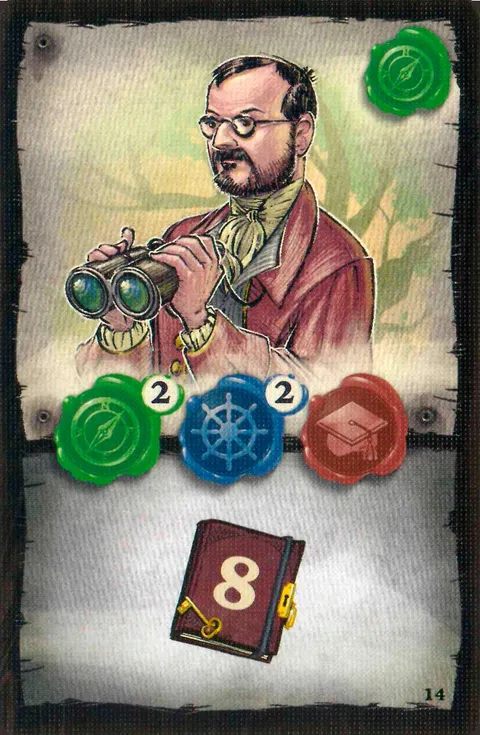 | 14. Gain 8 victory points. |
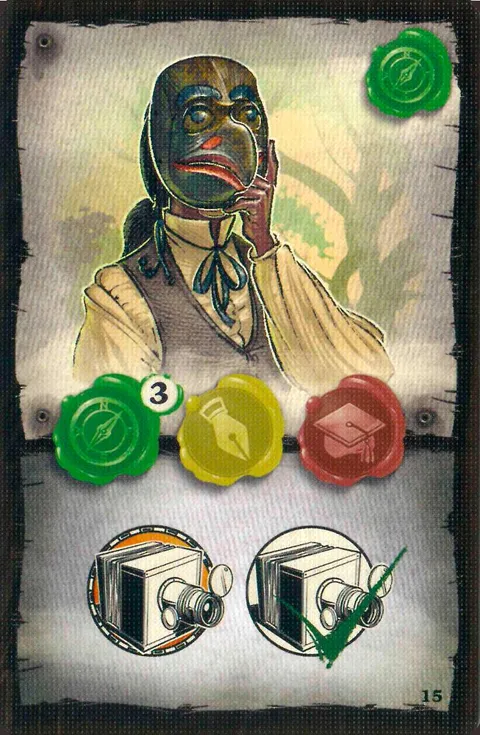 | 15. Gain an Objective, then fulfil any one Objective without its requirements. |
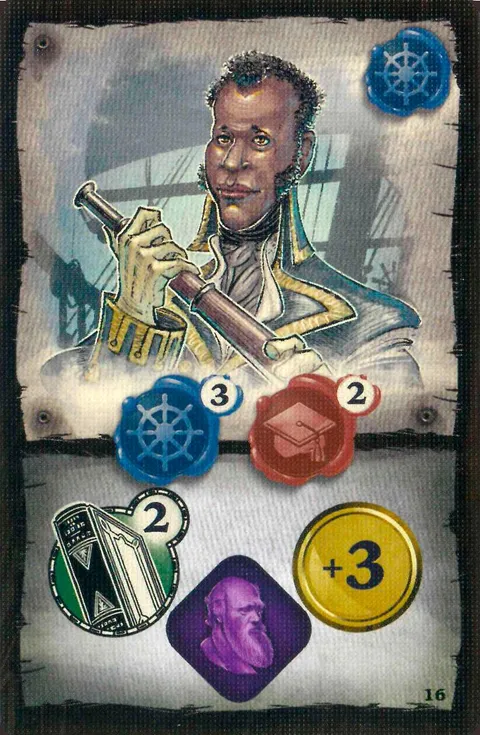 | 16. Advance 2 Evolution steps, gain 1 Temporary Knowledge and 3 Coins. |
Fireland cards and tiles
Short tag: [Fireland]. See the Fireland page for the rules.
Fireland components
| Component |
|---|
 | Fireland map board. Covers the Island and Ocean tracks: 5 Land tracks, 3 Ocean tracks. |
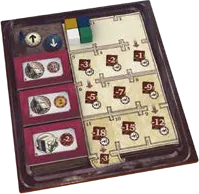 | Time Track board. Your Time marker moves down as you spend Time; 3 Time Penalty tokens sit on it. |
 | Time Penalty tokens (8). Three are used per game. Their effects apply when the matching action occurs; the Academy penalty is paid for each Academy action (FAQ). |
 | Land Adventure tokens (12). On golden ribbons of the Land tracks; taken with the token reward of an Adventure. |
 | Ocean Adventure tokens (10). The same on the Ocean tracks. |
 | Time Wax Seals (8). Cost 1 extra Time when bought, paid once; after placement the seal can count as any colour (FAQ). |
 | Viewpoint tokens (6). At the track ends: the first to arrive takes the action. An Academy discount reduces the seal’s full cost, including the Time penalty, which applies to every Academy action (FAQ). |
 | Elude Time tokens (4). Only with Special Action F5. |
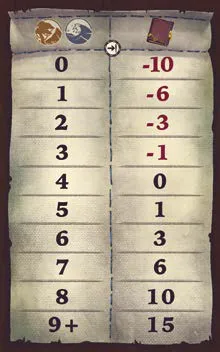 | Adventure Scoring aid (4). End-game points for Adventure tokens: −10 for none up to +15 for 9 or more. |
 | Ships and Explorers (2 each per colour). Extra pieces for the extra tracks. FAQ |
 | Fireland Scenario cards (4). F1–F4: preset tiles instead of random ones. Some red-banner cards name B tiles from the Scenarios mini-expansion; use the corrected tile list linked from the FAQ. |
Fireland Special Action tiles
| Action |
|---|
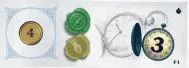 | F1. Gain 3 Time. |
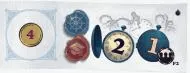 | F2. Gain 2 Time; every other player spends 1 Time. |
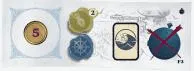 | F3. Go on an Ocean Adventure without spending Time; the token reward may come from anywhere on the map. |
 | F4. Go on a Land Adventure without spending Time; the token reward may come from anywhere on the map. |
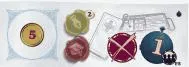 | F5 — Elude Time. Take an Elude Time token: ignore every Time penalty this round. Every other player spends 1 Time. Tokens are discarded at Cleanup. |
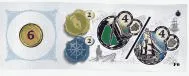 | F6. On the Fireland map, split 4 movement spaces between up to 2 Explorers or up to 2 Ships; on the base map, it is up to 2 Explorers for 4 spaces total, or your Ship for 4; take bonuses along the route at any point during your turn (FAQ). |
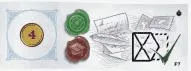 | F7. Do the top (1st) reward of any Correspondence tile on the board, paying its costs. |
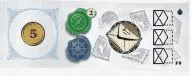 | F8. Place one Stamp on each of the three Envelopes; the Fireland Time Penalty that places one fewer Stamp applies to this tile too (FAQ). |
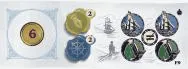 | F9. On the base map, move up to 2 Explorers one step each and your one Ship one step; each moved piece takes its landing action (FAQ). |
Fireland Crew cards
| Reward when achieved |
|---|
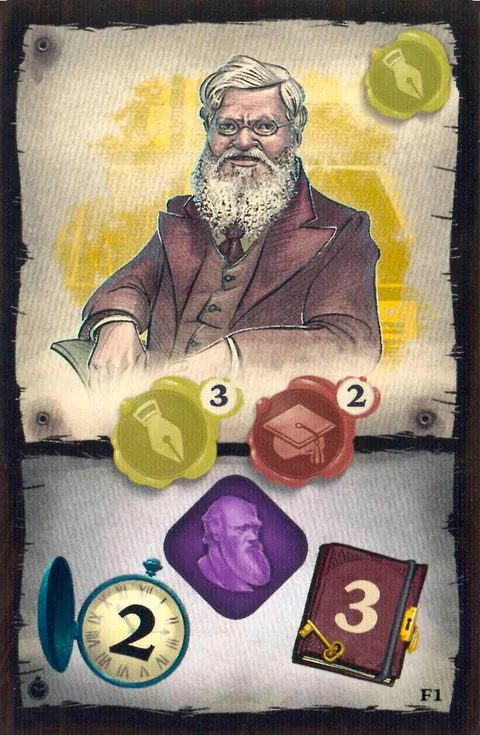 | F1. Gain 2 Time, 1 Temporary Knowledge and 3 victory points. |
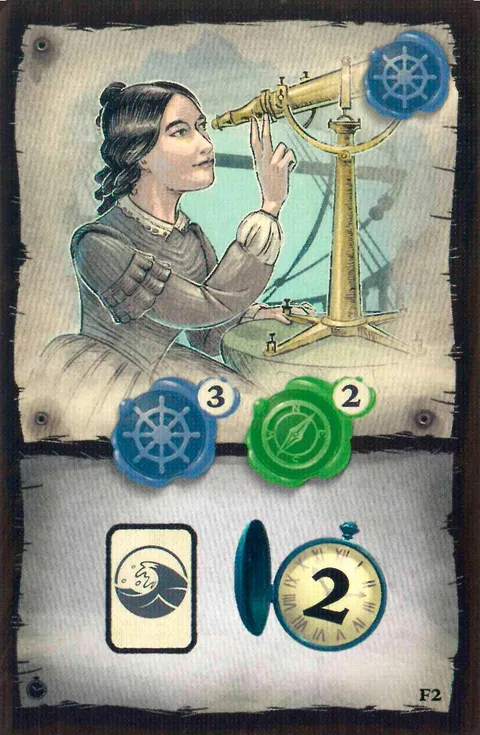 | F2. Go on an Ocean Adventure and gain 2 Time; the token reward may come from anywhere on the map. |
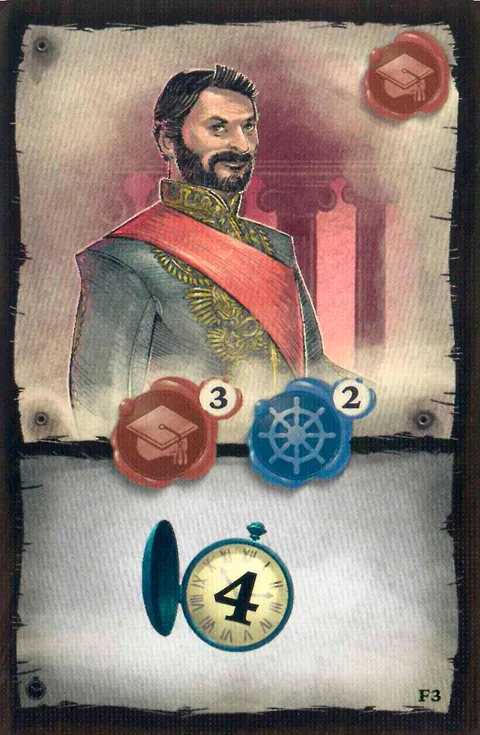 | F3. Gain 4 Time. |
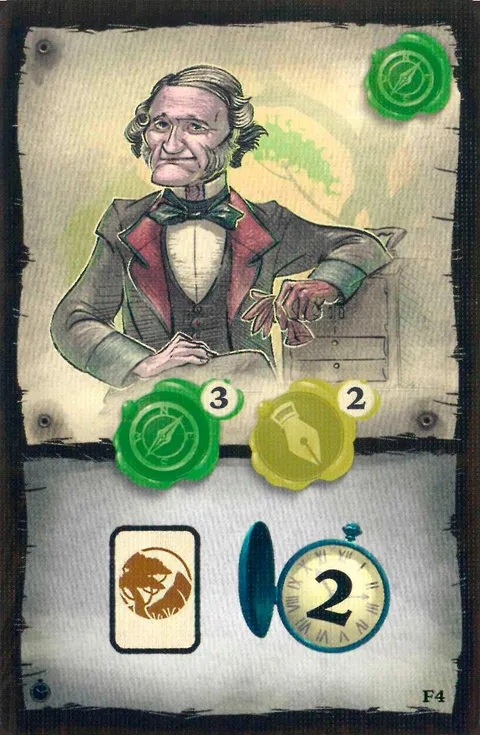 | F4. Go on a Land Adventure and gain 2 Time; the token reward may come from anywhere on the map. |
Fireland Objective tiles
| Requirements |
|---|
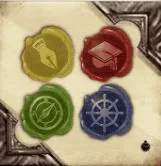 | One Regular seal of each colour. |
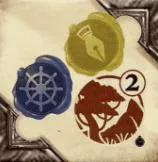 | A yellow seal, a blue seal and 2 Land Adventure tokens. |
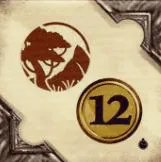 | A Land Adventure token and 12+ Coins. |
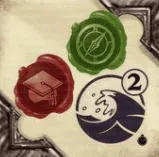 | A green seal, a red seal and 2 Ocean Adventure tokens. |
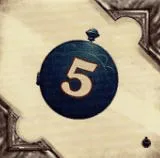 | 5+ Time spent. |
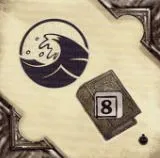 | An Ocean Adventure token and Evolution step 8. |
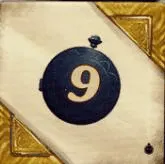 | 9+ Time spent. |
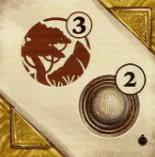 | 3 Land Adventure tokens and 2 Lenses placed. |
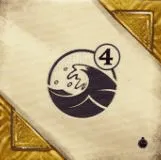 | 4 Ocean Adventure tokens. |
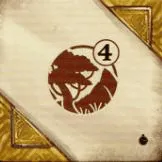 | 4 Land Adventure tokens. |
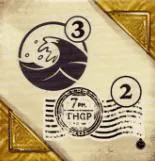 | 3 Ocean Adventure tokens and 2 empty Stamp stacks. |
 | A Crew card achieved and Evolution step 5. |
Time Penalty tokens
| Penalty |
|---|
 | 1. Correspondence actions place one Stamp fewer. FAQ |
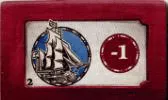 | 2. Navigation actions move one space fewer. |
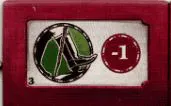 | 3. Exploration actions move one space fewer. |
 | 4. Pay 1 Coin per Academy action. FAQ |
 | 5. Museum deliveries give one Evolution step fewer. |
 | 6. Pay 2 Coins per Museum delivery. |
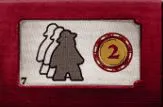 | 7. Placing in an occupied Diary section costs 2 more Coins. |
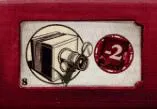 | 8. Lose 2 victory points per Objective achieved (none to lose: you cannot achieve it). |
Viewpoint tokens
| Action for the first to arrive |
|---|
 | Advance 2 Evolution steps. |
 | A Correspondence action of 3 Stamps. |
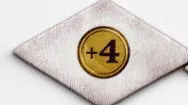 | Gain 4 Coins. |
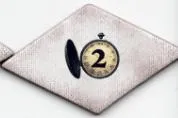 | Gain 2 Time. |
 | Place a Lens with a 2-Coin discount. |
 | An Academy action with a 2-Coin discount. FAQ |
Land Adventure cards
Each card: pay option A or B, take its rewards; “take the token” means the option that also gives you the Adventure token. If the Adventure deck empties, shuffle its discards to make a new deck (FAQ).
| Options |
|---|
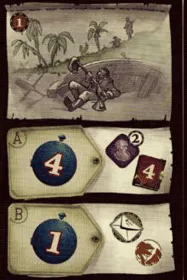 | Riot. A: 4 Time → 2 Temporary Knowledge and 4 points · B: 1 Time → Correspondence of 1 Stamp, take the token |
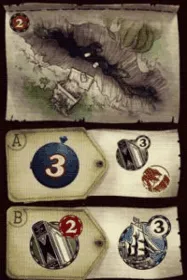 | Lost Specimens. A: 3 Time → 3 Evolution steps, take the token · B: 2 Evolution steps back → Navigation up to 3 |
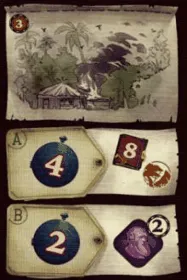 | Fire. A: 4 Time → 8 points, take the token · B: 2 Time → 2 Temporary Knowledge |
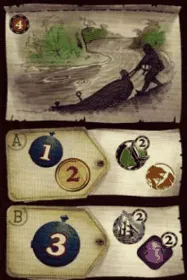 | Raft Damaged. A: 1 Time and 2 Coins → Exploration up to 2, take the token · B: 3 Time → Navigation up to 2 and 2 Temporary Knowledge |
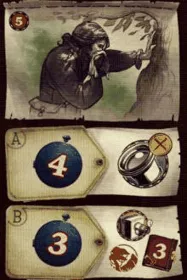 | Cold. A: 4 Time → unlock a Lens location without Coins · B: 3 Time → an Objective and 3 points, take the token |
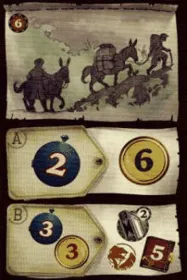 | Donkeys. A: 2 Time → 6 Coins · B: 3 Time and 3 Coins → 2 Evolution steps and 5 points, take the token |
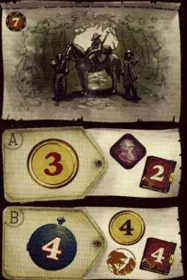 | Bandits. A: 3 Coins → 1 Temporary Knowledge and 2 points · B: 4 Time → 4 Coins and 4 points, take the token |
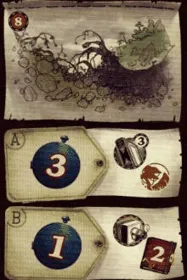 | Landslide. A: 3 Time → 3 Evolution steps, take the token · B: 1 Time → an Objective and 2 points |
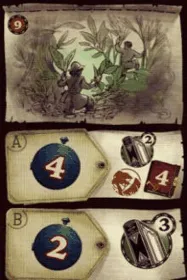 | Secret Path. A: 4 Time → 2 Evolution steps and 4 points, take the token · B: 2 Time → 3 Evolution steps |
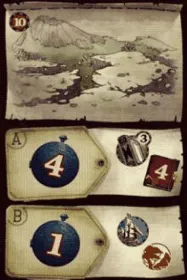 | Earthquake. A: 4 Time → 3 Evolution steps and 4 points · B: 1 Time → Navigation up to 1, take the token |
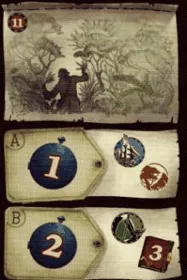 | Lost. A: 1 Time → Navigation up to 1, take the token · B: 2 Time → Exploration up to 1 and 3 points |
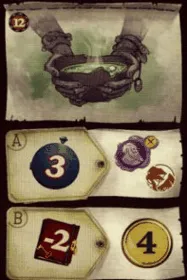 | Beverage. A: 3 Time → a free Special Wax Seal, take the token · B: lose 2 points → 4 Coins |
Ocean Adventure cards
| Options |
|---|
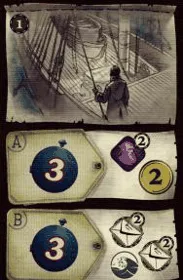 | Seasickness. A: 3 Time → 2 Temporary Knowledge and 2 Coins · B: 3 Time → two Correspondence actions of 2 Stamps, take the token |
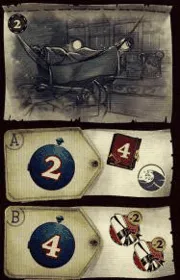 | Sickness. A: 2 Time → 4 points, take the token · B: 4 Time → two Academy actions 2 Coins cheaper |
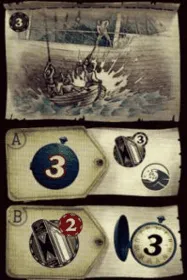 | Thunderstorm. A: 3 Time → 3 Evolution steps, take the token · B: 2 Evolution steps back → gain 3 Time |
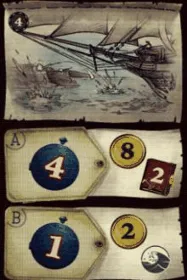 | Cannons. A: 4 Time → 8 Coins and 2 points · B: 1 Time → 2 Coins, take the token |
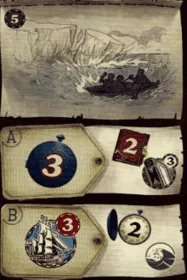 | Iceberg. A: 3 Time → 2 points and 3 Evolution steps · B: your Beagle-track Ship 3 spaces back → gain 2 Time, take the token. FAQ. Resolve the Adventure at any point in your turn; if its Ship movement would interrupt a move, you may set it aside and finish moving first () |
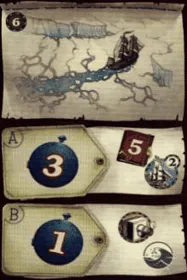 | Ice. A: 3 Time → 5 points and Navigation up to 2 · B: 1 Time → an Objective, take the token |
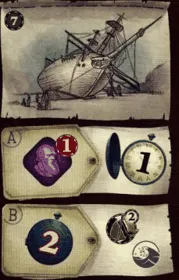 | Laid Ashore. A: 1 Temporary Knowledge → gain 1 Time · B: 2 Time → Exploration up to 2, take the token |
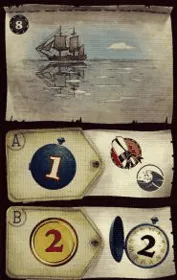 | Mirage. A: 1 Time → an Academy action, take the token · B: 2 Coins → gain 2 Time |
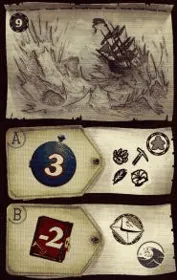 | Rough Sea. A: 3 Time → research a specimen on the track of your Explorer · B: lose 2 points → Correspondence of 1 Stamp, take the token |
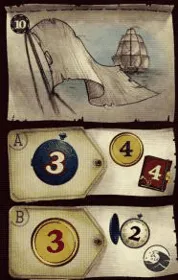 | Another Ship. A: 3 Time → 4 Coins and 4 points · B: 3 Coins → gain 2 Time, take the token |
Oceania cards and tiles
Short tag: [Oceania]. See the Oceania page for the rules. The Oceania rulebook pictures its tiles only as groups, so each row below shows the group; single-face pictures are listed as a gap in the handover.
| Component |
|---|
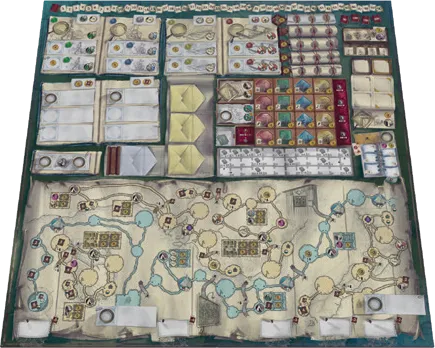 | Oceania main board (double-sided). Four Island tracks explored right to left, Post Office, University, two Villages, two Map Lens locations, the Hazard track and the Antidote Lens location. A Campsite on the second island misses its Tent icon by misprint (FAQ); ribbon points marked 4+ always count (FAQ); the three-Stamp Campsite on the Ocean track is three separate Correspondence actions (FAQ). |
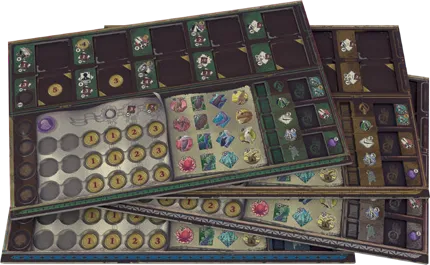 | Oceania personal boards (4). New Tent and Objective rewards, Alfred on the back; also playable with the base map and Fireland. See Personal boards. |
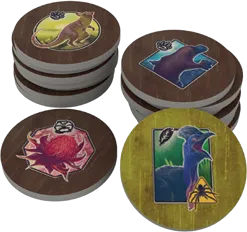 | Oceania Specimen tokens (16). Laid Hazard side up; the first player to research one meets a Hazard and flips it. |
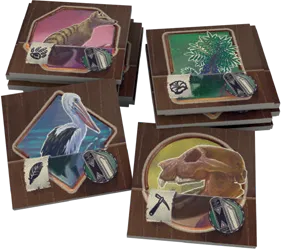 | Oceania Museum tiles (16). Match the Oceania specimens. |
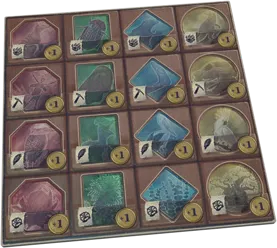 | Museum Overlay tile. Covers the Museum of the base board when you use Oceania specimens there. |
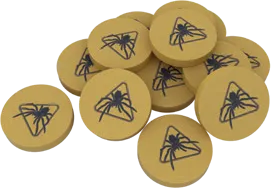 | Hazard tokens (13). On the spider ribbons; the first player to cross takes one. Only crossing a ribbon gives a token (FAQ). |
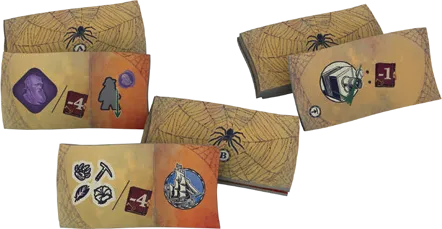 | Consequence tiles (12). A and B: a loss per Hazard step plus a one-time reward for the player furthest down; C: points lost per step. All twelve are in the Consequence table. |
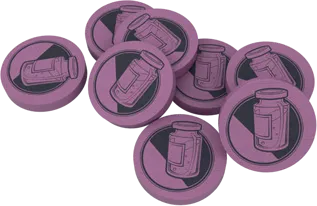 | Antidote tokens (8). Two per player cover one Objective bonus and one empty-Stamp-stack bonus; use the Antidote at once or lose it (FAQ). |
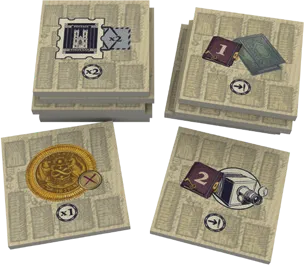 | Village tiles (12). Six silver (immediate rewards) and six golden (final scoring); all are in the Village tables. |
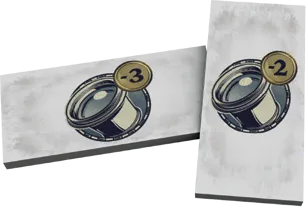 | Discount tiles (2). −3 (Ocean track) and −2 (first island): unlock discount for the Map Lens locations, then flipped over the tile’s seal requirements. |
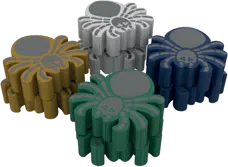 | Spiders (2 per colour). Hazard marker on the Hazard track and Spider marker for negative points. |
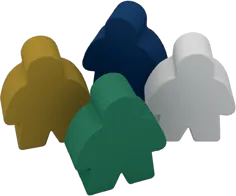 | Explorers (3 per colour). Post Office (Employee), University (Professor) and the first island. A removed Explorer returns to your supply (FAQ). |
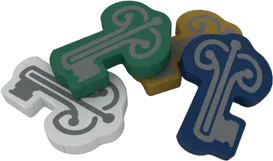 | Key tokens (1 per colour). Replace the scoring cubes. |
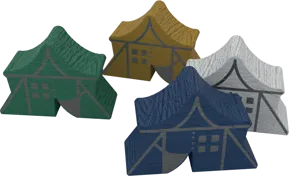 | Special Tents (1 per colour). Silver Village 3: takes a Campsite twice; it does not replace a regular Tent (FAQ). |
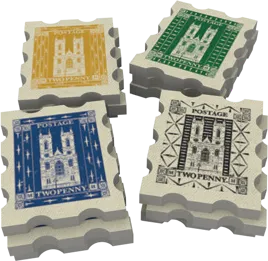 | Special Stamps (2 per colour). Silver Village 2: count double for majorities and double the reward. |
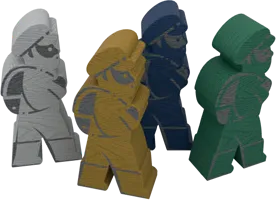 | Special Workers (1 per colour). Silver Village 6: once per game, no penalty and no seal requirement; cannot be returned (FAQ). |
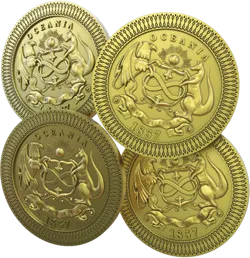 | Special Coins (4). Silver Village 1: cancel one Coin cost of an action (FAQ). |
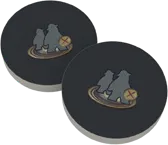 | Special Placement tokens (8). Silver Village 4: place on an occupied Lens location without the placement penalty. |
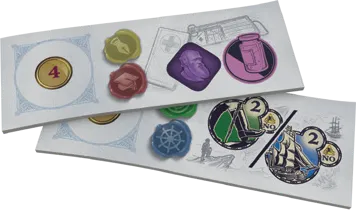 | Special Action tiles O1–O2. O1: 1 Temporary Knowledge and an Antidote. O2: up to 2 steps on one Ocean or Island track, Hazards optional (FAQ). |
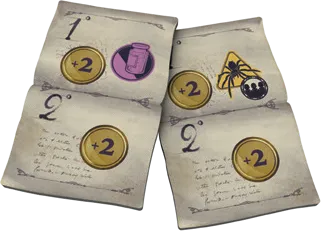 | Correspondence tiles O1–O2. O1: 1st 2 Coins and every other player one Hazard step (FAQ), 2nd 2 Coins. O2: 1st 2 Coins and an Antidote, 2nd 2 Coins. |
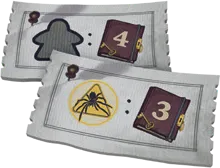 | Beagle Goal tiles O1–O2. O1: 4 points per Explorer on the board, Employee and Professor included. O2: 3 points per Hazard token. |
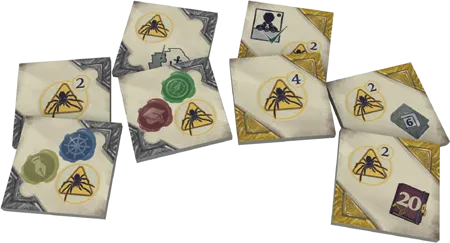 | Objective tiles (4 silver, 4 golden). Some require Hazard tokens  . Single tiles: to be added. |
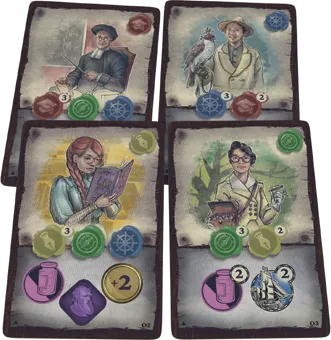 | Crew cards (4). Shuffled into the base deck. Single cards: to be added. |
Oceania modules
Usable with Oceania, the base game or Fireland; rules on the Oceania page.
| Component |
|---|
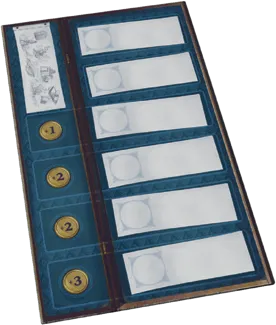 | Special Action Board. Six Special Action tiles to choose from when unlocking, each row with an extra Coin cost that free-unlock and locked-action effects still pay (FAQ). |
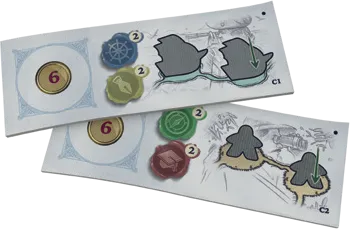 | Travel Special Action tiles C1–C2. C1: your Ship jumps in front of an opponent’s Ship; C2: your Explorer in front of an opponent’s on the same Island track. Forward only (FAQ). |
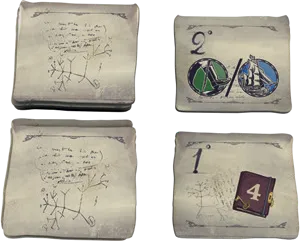 | Fragmented Letter tiles (24). 1° top halves and 2° bottom halves that combine into Correspondence tiles. Can include the new Envelope with Fireland’s Stamp tile (FAQ). |
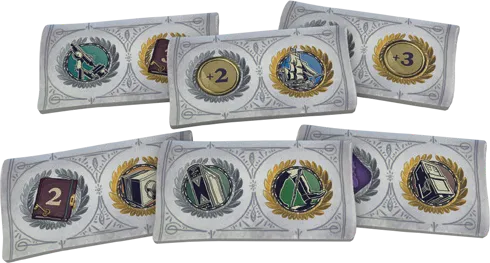 | Distinction tiles (6). Cover the printed distinctions with new bonuses. |
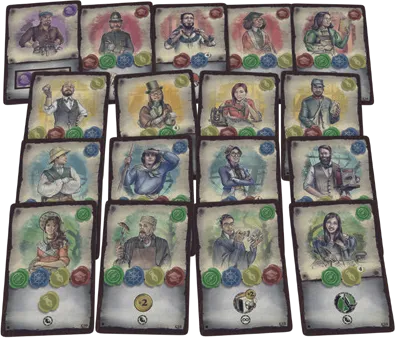 | Crew cards C1–C17. C1: chosen at setup, that worker starts with a purple seal but takes only two more. C2: every Evolution advance goes 2 further. C3, C8, C10, C16: once per round, one worker gets the extra seal shown, for location requirements only (FAQ). C4: once per round, move a Ship up to 2. C5: once per round, take an Objective from the discards. C6: once per round, research a specimen already in the Museum. C7: once per round, place up to 2 Stamps. C9: no Coin penalty for Museum deliveries. C11: once per round, 2 Coins. C12: 2 Coins each time you take an Objective. C13: once per round, move an Explorer 1. C14: once per round, pay 1 Coin for 1 Temporary Knowledge. C15: occupied-Diary penalty 1 less. C17: once per round, an Academy action for 1 seal. |
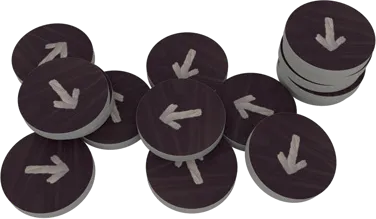 | Crew markers (12). Point at the worker that achieved an ongoing or once-per-round Crew card. |
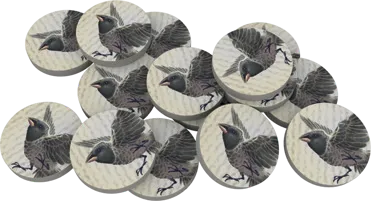 | Chaffinch tokens (15). Cover Island-track ribbon points once scored. |
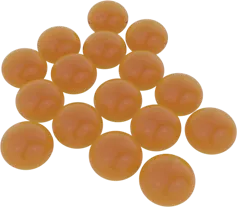 | Amber Research tokens (20). Mark researched specimens not yet delivered. |
Tiles
Special Action tiles
Six per game (four in solo), on the Special Action Diary. Each tile shows its seal requirement and its Lens cost on the left. The number is in the bottom-right corner.
| Action |
|---|
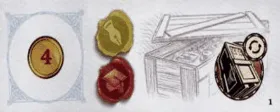 | 1 — Repeat Delivery. Deliver a specimen already in the Museum (you need its Research token), as if placing it for the first time. If its row is full, you still get the extra Evolution step; the row Coin goes to the first player to deliver there. You may achieve an Objective between two deliveries (FAQ, between deliveries). Research tokens stay on your board; if the row is full, you still get its extra Evolution step, and the row Coin goes to the first player to deliver there (FAQ, ). |
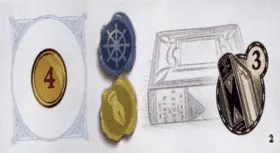 | 2. Advance your Evolution marker 3 steps. |
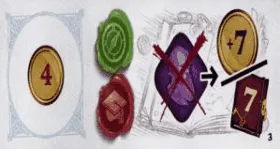 | 3. Spend 1 Temporary Knowledge for 7 Coins or 7 victory points. |
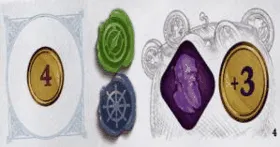 | 4. Gain 1 Temporary Knowledge and 3 Coins. |
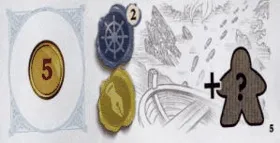 | 5. Place an unused Explorer at the start of an island where you have none. |
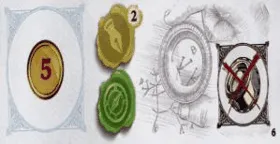 | 6. Do all the actions of a locked space, without unlocking it or needing seals. |
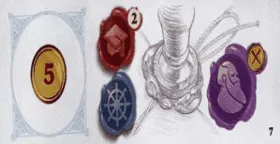 | 7. Put a Special Wax Seal on the leftmost open space of a worker row, free. |
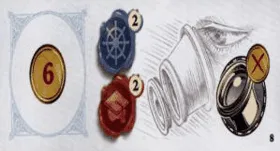 | 8. Unlock a Lens location without paying its Coins. FAQ |
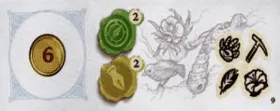 | 9. Research any specimen you do not have yet. |
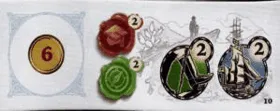 | 10. An Exploration 2 and a Navigation 2, in either order. |
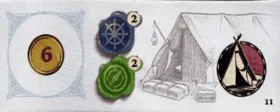 | 11. Put your top Tent on any open campsite, pay its cost and take its rewards. |
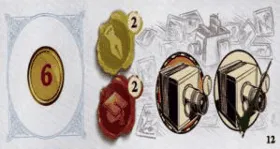 | 12. First gain an Objective, then fulfil an Objective without its requirements; if your spaces are full, you can still fulfil one (FAQ). |
Correspondence tiles
Three per game, one on each Envelope: the 1st section pays the most Stamps, the 2nd section the second most. Each action chooses its own Envelope and places up to the stated number; resolve Envelopes top to bottom. An empty-stack bonus is claimed once, when that stack empties; ties for most all receive the first reward and the next player receives the second (separate choices, one-time bonuses, order, partial placement, ties).
| Rewards |
|---|
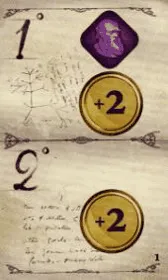 | 1. 1st: 1 Temporary Knowledge and 2 Coins · 2nd: 2 Coins. |
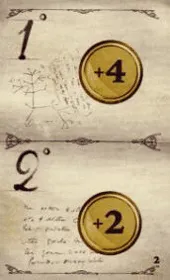 | 2. 1st: 4 Coins · 2nd: 2 Coins. |
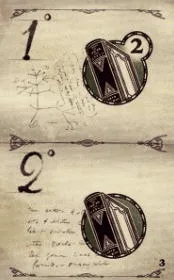 | 3. 1st: 2 Evolution steps · 2nd: 1 step. |
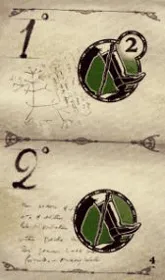 | 4. 1st: Exploration 2 · 2nd: Exploration 1. |
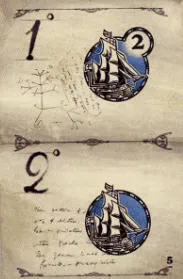 | 5. 1st: Navigation 2 · 2nd: Navigation 1. |
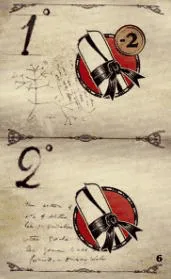 | 6. 1st: an Academy action 2 Coins cheaper · 2nd: an Academy action. |
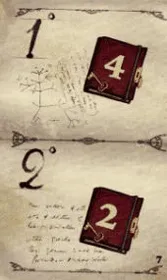 | 7. 1st: 4 victory points · 2nd: 2 victory points. |
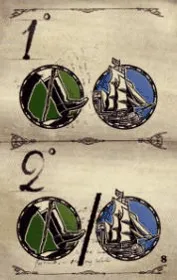 | 8. 1st: Exploration 1 and Navigation 1, either order · 2nd: Exploration 1 or Navigation 1. FAQ |
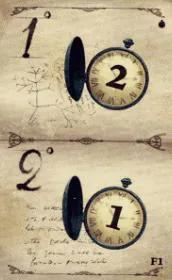 | F1 [Fireland]. 1st: gain 2 Time · 2nd: gain 1 Time. FAQ |
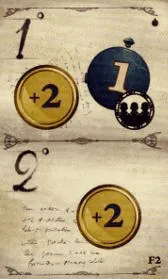 | F2 [Fireland]. 1st: 2 Coins, and every other player spends 1 Time · 2nd: 2 Coins. |
Beagle Goal tiles
Five per game below the map; the one under the HMS Beagle is scored each Reward phase, minus lagging penalties.
| Points |
|---|
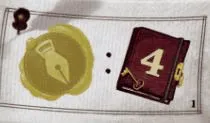 | 1. 4 per yellow Wax Seal. |
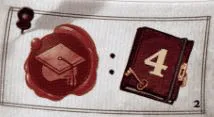 | 2. 4 per red Wax Seal. |
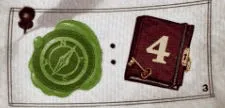 | 3. 4 per green Wax Seal. |
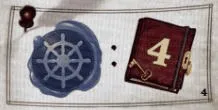 | 4. 4 per blue Wax Seal. |
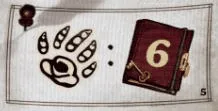 | 5. 6 per reptile researched. |
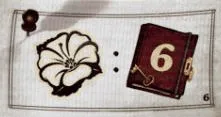 | 6. 6 per plant researched. |
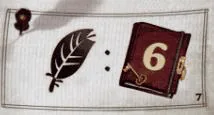 | 7. 6 per bird researched. |
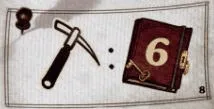 | 8. 6 per fossil researched. |
 | 9. 8 per empty Stamp stack. |
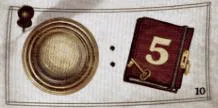 | 10. 5 per location you unlocked with your Lens. |
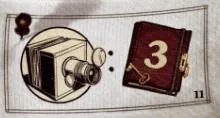 | 11. 3 per achieved Objective. |
 | 12. 4 per Tent on a campsite. |
 | F1 [Fireland]. 6 per Ocean Adventure token. |
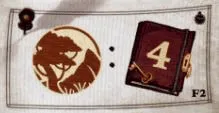 | F2 [Fireland]. 4 per Land Adventure token. |
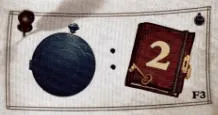 | F3 [Fireland]. Twice your Time marker value before any lagging penalty; at 5 Time, score 10 before deductions. FAQ |
Objective tiles
Silver and golden tiles (the frame shows which), including the 8 Starting Objectives. They show requirements only; the reward is the personal-board space where you put them (Objectives). Ordinary seals anywhere on your board count, but Special Wax Seals and Temporary Knowledge do not. You may achieve an Objective on your turn or during the specified Reward phases, when you meet its conditions and have a matching empty space. A blank specimen count means one specimen; if no matching space remains, you cannot take or achieve one (seal types, seal location, timing, empty spaces, specimen count,, lagging cap).
| Requirements |
|---|
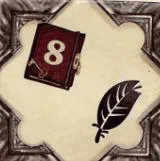 | 8+ victory points and a bird. |
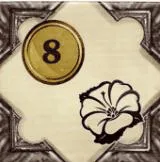 | 8+ Coins and a plant. |
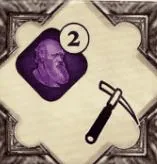 | 2+ Temporary Knowledge and a fossil. |
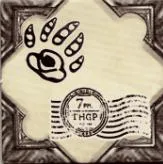 | A reptile and 1 empty Stamp stack. |
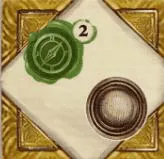 | 2 green seals and 1 personal Lens placed. |
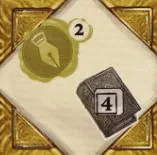 | 2 yellow seals and Evolution step 4. |
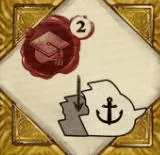 | 2 red seals and your Ship level with or ahead of the Beagle. |
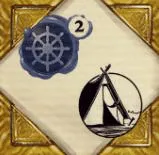 | 2 blue seals and 1 Tent placed. |
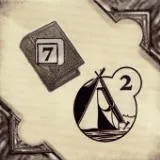 | Evolution step 7 and 2 Tents placed. |
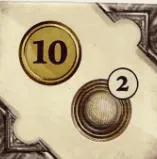 | 10+ Coins and 2 personal Lenses placed. |
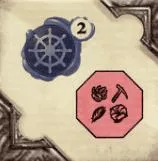 | 2 blue seals and a red-octagon specimen. |
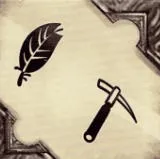 | A bird and a fossil. |
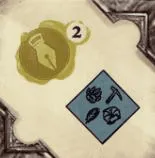 | 2 yellow seals and a blue-diamond specimen. |
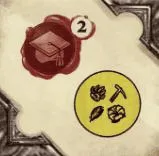 | 2 red seals and a yellow-circle specimen. |
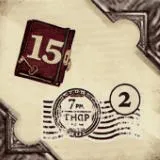 | 15+ victory points and 2 empty Stamp stacks. |
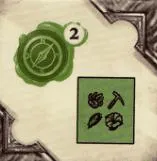 | 2 green seals and a green-square specimen. |
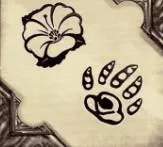 | A plant and a reptile. |
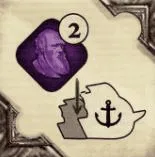 | 2 Temporary Knowledge and your Ship level with or ahead of the Beagle. |
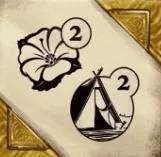 | 2 plants and 2 Tents placed. |
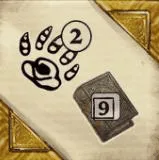 | 2 reptiles and Evolution step 9. |
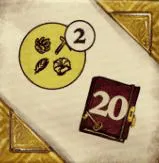 | 2 yellow-circle specimens and 20+ victory points. |
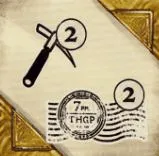 | 2 fossils and 2 empty Stamp stacks. |
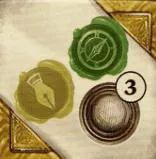 | A yellow seal, a green seal and 3 Lenses placed. |
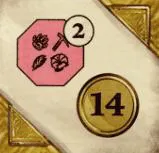 | 2 red-octagon specimens and 14+ Coins. |
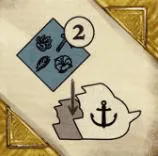 | 2 blue-diamond specimens and your Ship level with or ahead of the Beagle. |
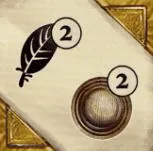 | 2 birds and 2 Lenses placed. |
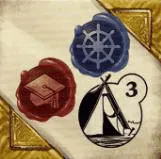 | A red seal, a blue seal and 3 Tents placed. |
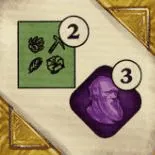 | 2 green-square specimens and 3 Temporary Knowledge. |
Tokens & pieces
Komodo Dragon
Short tag: [Komodo]. See the Komodo Dragon page.
| Component |
|---|
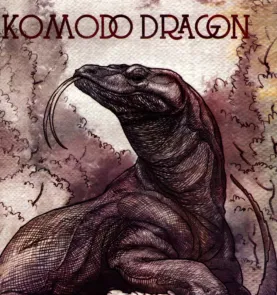 | Komodo Dragon. Roams to the specimen last delivered; whoever ends a move on it takes every bonus on the silver plate. |
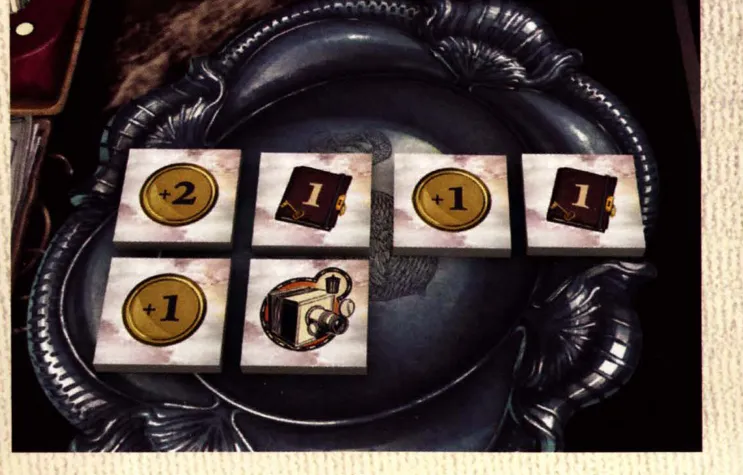 | Museum Bonus tiles (20). Coins, victory points or a discarded Objective: they replace the Coin of each empty Museum space. |
Icons
To be added.