Teach the Game
A script to teach Coimbra at the table — how you win, the board and your player board, a round of six phases, the end, every way to score and what each resource is for.
How you win
“Portugal, the Age of Discovery. We head old houses of Coimbra and court its council members, merchants, clerics and scholars. Four rounds, about an hour and a half. Each round we draft dice: a die’s value is its price and its place in line, its colour is the income it brings later. Most victory points wins.”
You score from many sources, mostly at the end:
- Influence tracks — each card moves you up a track; the leaders of each track score its tile.
- Voyages you invested in, diploma sets, game end cards.
- Pilgrim visits to monasteries, and points from income, cards and favors during play.
- Leftover guards, coins and crowns, halved.
The loop: place three dice, then cash them in — for favor tiles in the castle or character cards in the three cities — then each die’s colour pays income from the matching influence track.
The boards
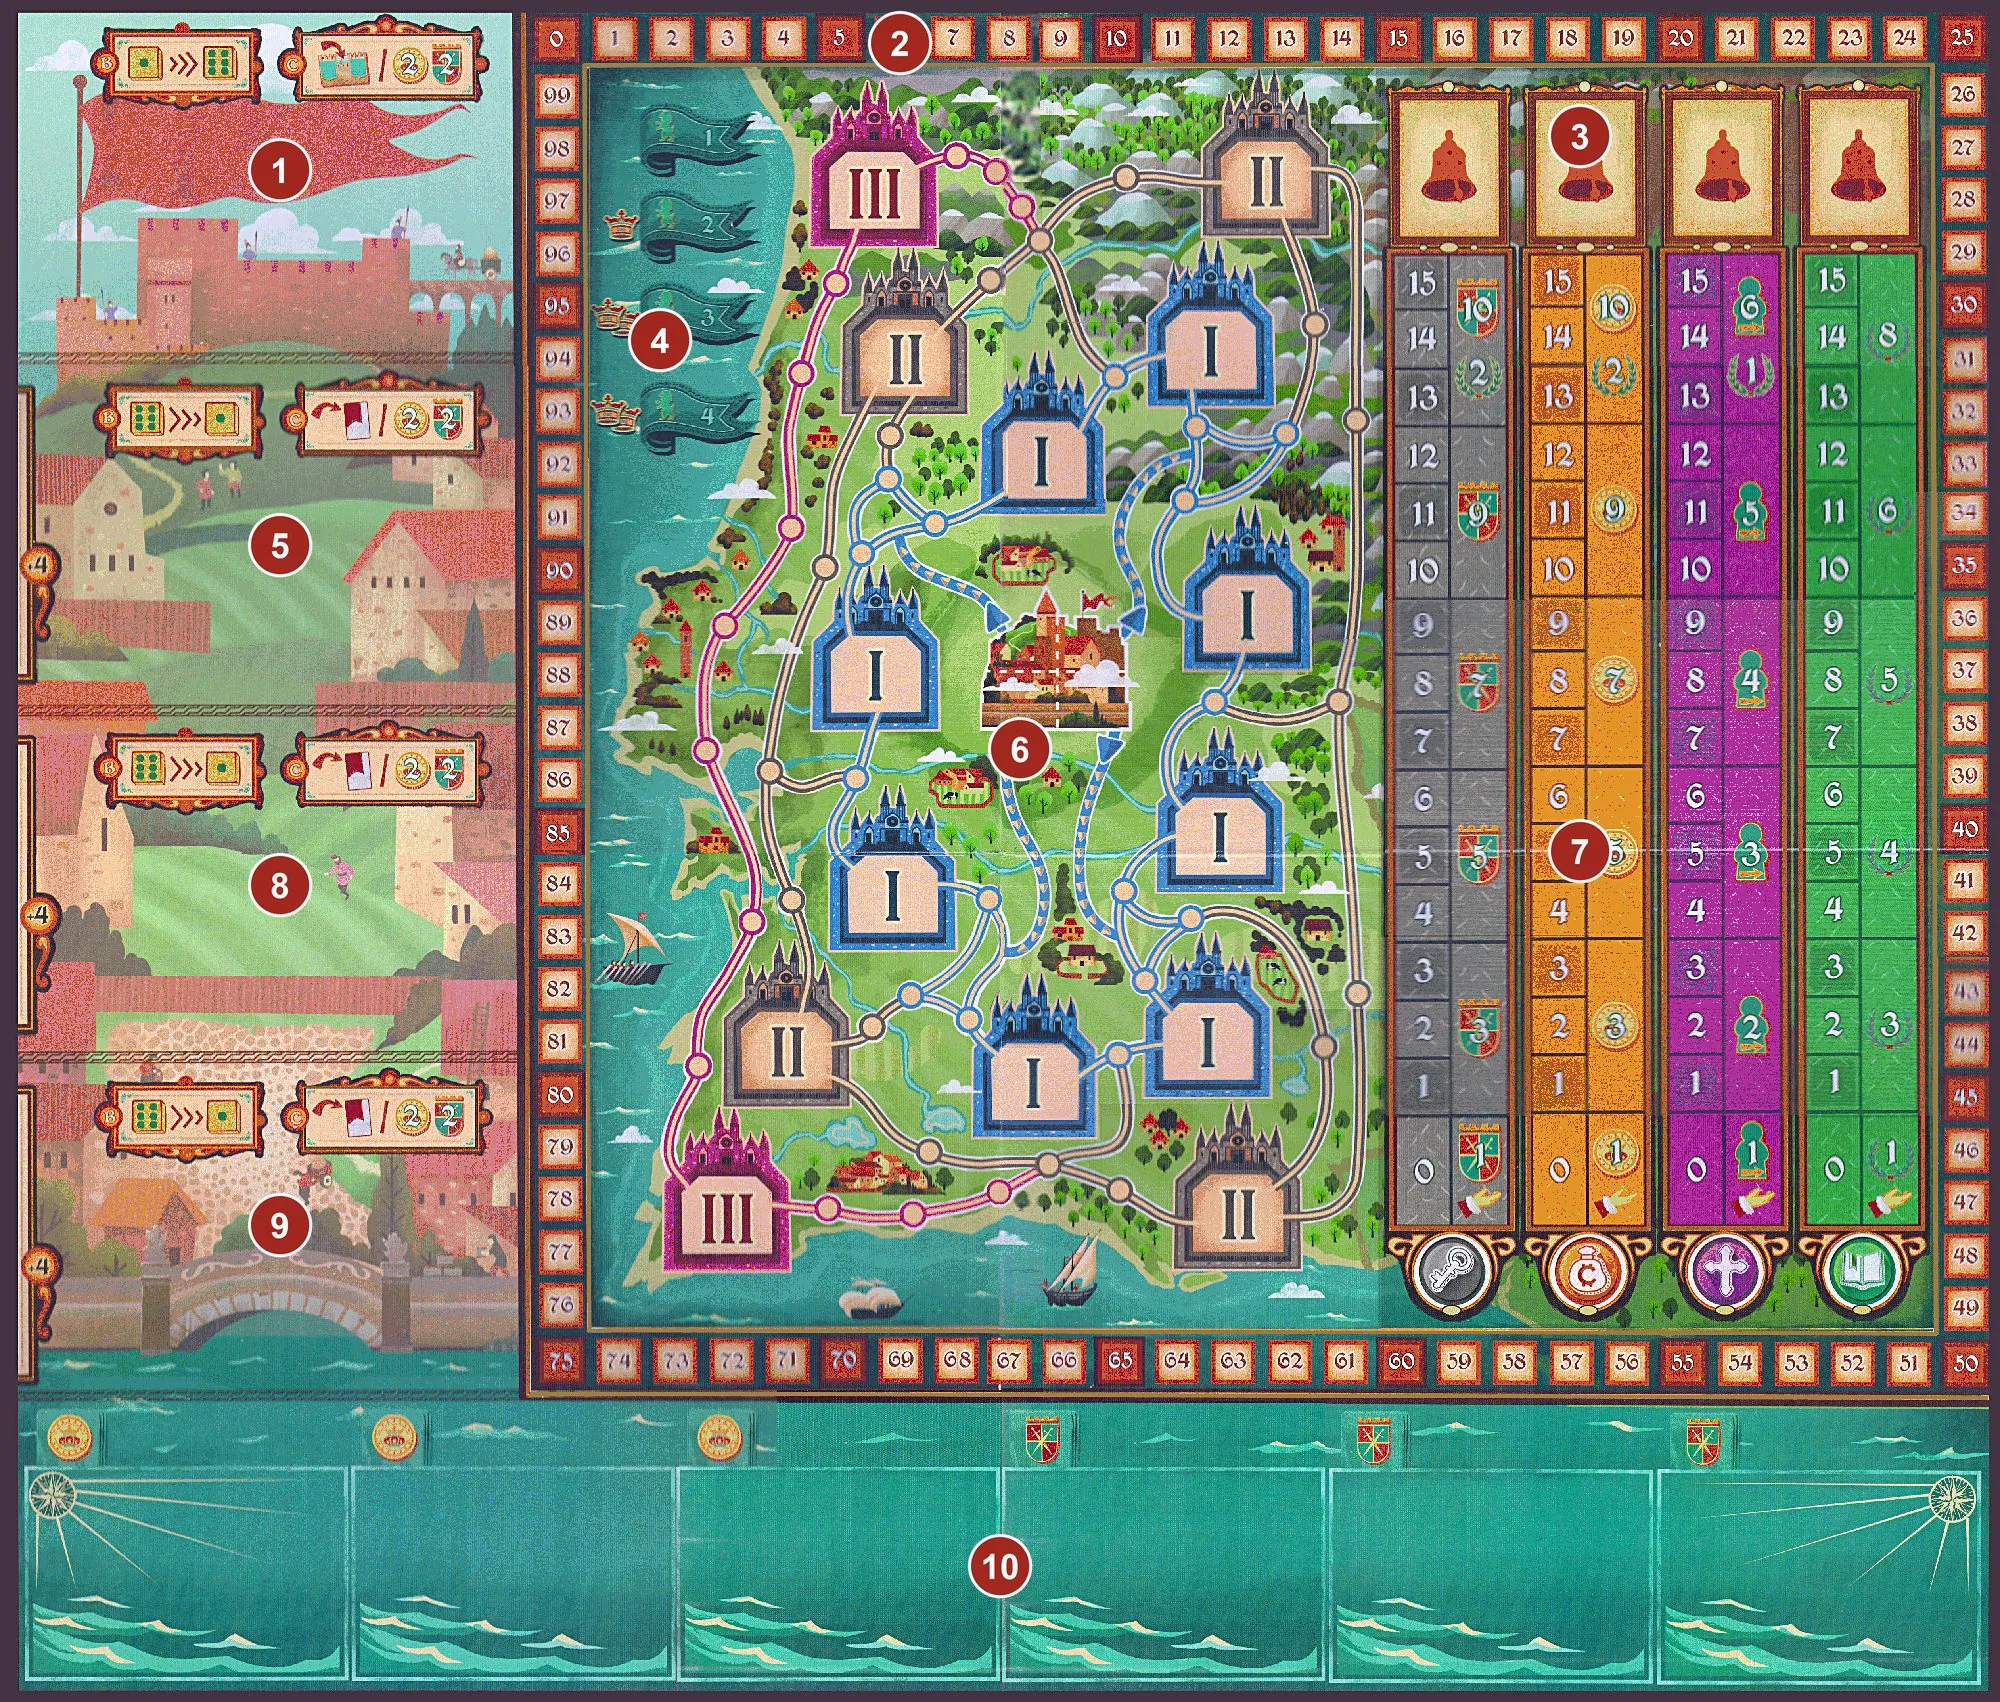
- Castle — dice here win favor tiles; lowest die first.
- Score track — victory points, 0–99.
- Influence scoring spaces — the tile above each track pays its leaders at the end.
- Player order flags — the lions; flags 2–4 come with crowns.
- Upper city — 4 character cards to its left; highest die first.
- Pilgrim map — roads from Coimbra to 14 monasteries.
- Influence tracks — council, merchant, cleric and scholar, 0–15, with their income.
- Central city — another row of 4 cards.
- Lower city — the last row.
- Voyage card spaces — 3 voyages paid with coins, 3 with guards.
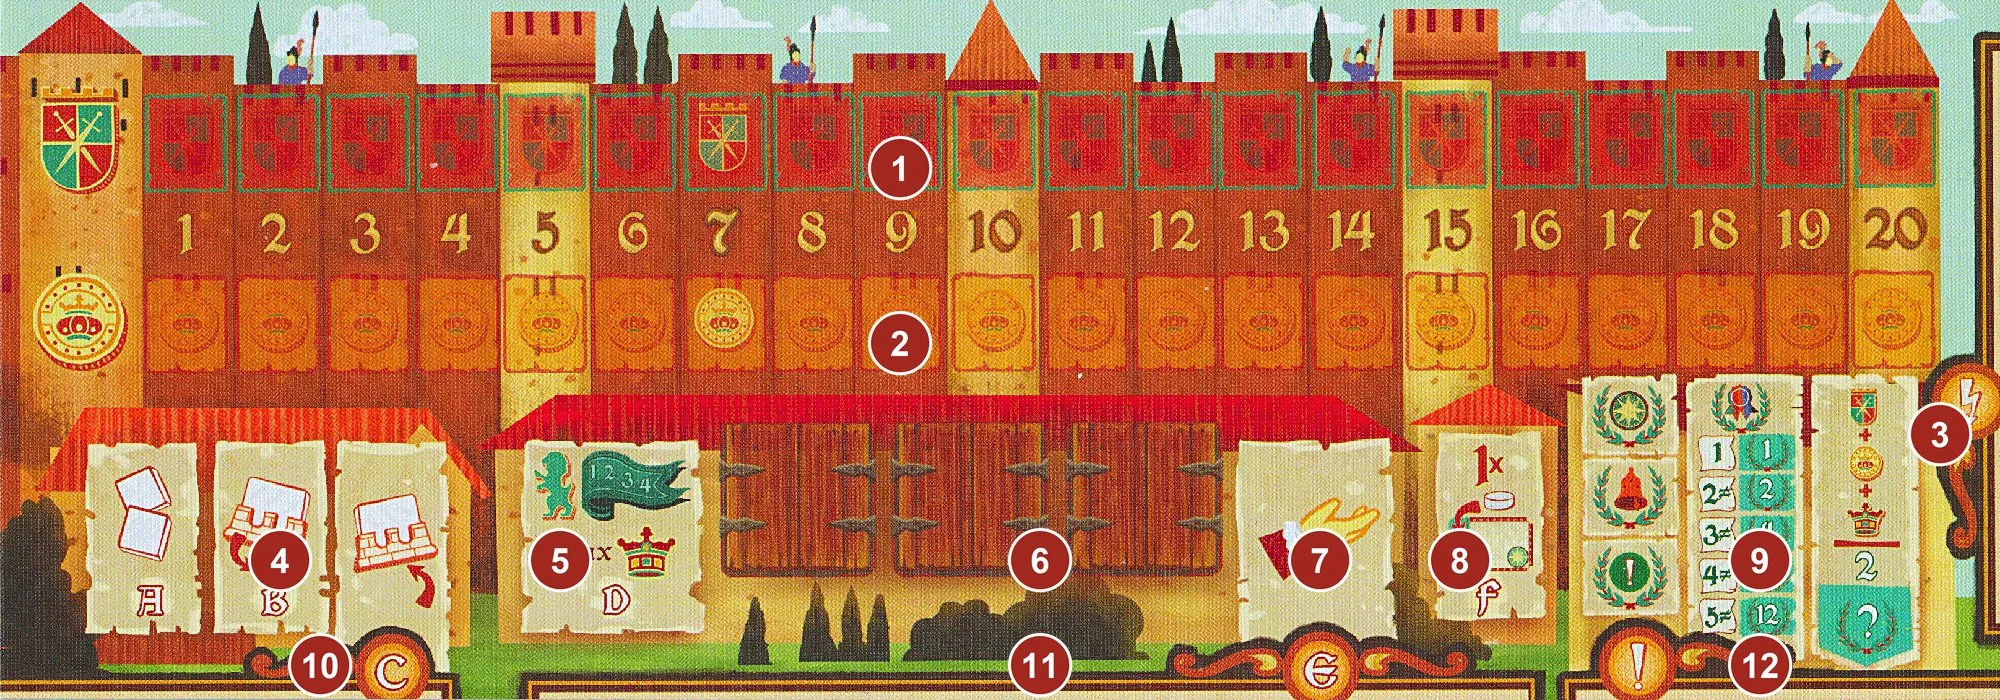
- Guard track — 0–20
 guards.
- Coin track — 0–20
 coins.
- Immediate bonus zone — used cards go to the right.
- Phases A–C reminder — roll, place, retrieve.
- Phase D reminder — most crowns plays first.
- Shutter spaces — your 3 die holders; retrieved dice wait here for income.
- Phase E reminder — income.
- Phase F reminder — one voyage.
- Final scoring reminder — voyages, tracks, diplomas, game end cards, resources.
- Phase C bonus zone — start cards with a lasting bonus.
- Phase E bonus zone — cards that add to your income.
- Game end bonus zone — cards that score at the end.
A round
Four rounds of six phases. Details.
- A – Roll: the first player rolls the dice pool.
- B – Place: in player order, take a die, put it in a die holder and place it in the castle (ascending row) or a city (descending row) — until everyone has placed 3.
- C – Retrieve: castle, upper, central, lower city in turn: the leftmost die’s owner takes a
favor tile or buys a card for the die’s value in or , or takes the distress action.
- D – New order: most crowns plays first.
- E – Income: each die’s colour collects the reward beside your disk on that track; white = any track.
- F – Voyage: in order, you may invest in one voyage.
Then deal 12 new cards, put the crown tokens out and play the next round.
How the game ends
- Trigger: after round 4 (the character stack is empty).
- Final scoring: voyages, influence tracks, diploma sets, game end cards, then guards + coins + crowns ÷ 2. Details.
- Ties: the tied player first in player order wins.
Ways to score
| Source | How and when |
|---|---|
| Cards, favors, monasteries | During play, whenever a bonus shows points |
 Scholar income | Phase E: a green die pays 1–8 points |
| Influence tracks | End: the scoring tile’s top value for the leader, middle for second (third with 4 players) |
| Voyages | End: each voyage you invested in scores its task |
 Diplomas | End: sets of different kinds — 1, 2, 4, 8 or 12 points |
 Game end cards | End: each card’s condition |
| Leftovers | End: guards + coins + crowns, halved (round down) |
| Losses | Some opponents’ cards make you give or lose points; your score can drop below 0 |
What each resource is for
| Resource | Why you need it | How you get it | How you use it |
|---|---|---|---|
| Dice | Your three actions each round | Draft from the pool | Value = place in line and price; colour = income |
| Coins | Cards with a coin icon, voyages | Merchant income, cards, favors | Pay a card’s cost (= the die value), coin voyages |
| Guards | Cards with a shield icon, voyages | Council income, cards, favors | Pay a card’s cost, guard voyages |
| Pilgrim steps | Monastery bonuses | Cleric income, cards, favors | Walk the map; each new monastery gives its bonus |
| Crowns | Player order, end points | Crown tokens, favor tiles, back flags | Phase D order; added to leftovers at the end |
| Character cards | Influence and bonuses | Buy with a city die | Influence value moves your disk; bonus by type |
| Influence | Bigger income, end majorities | Cards’ influence values, monasteries | Sets your income on each track; leaders score |
Teaching tips
- Before drafting, ask each player to name an affordable card and an income colour (rehearsal).
- Show one die three ways: its value orders the row and sets the price; its colour pays income later.
- Stress that the castle runs low to high and the cities high to low — and that high dice go first but cost more.
- Explain the income table early: a track is worth climbing only if you will take its colour.
- Point out the crown tokens on the rightmost cards: crowns decide who places first next round.