Exhibition and Cleanup
Maestro's Exhibition phase — the Collector colour order, Gallery scoring values, Major Publicity for the patron cards, Publicity tokens — and the Cleanup phase.
Gallery scoring
In the Exhibition phase you score your art across Italy. First resolve any effects that happen at the start of the phase (some Benefactor cards, Events), then score the Galleries, then Major Publicity.
Order of the colours
Place the four Resource tokens beside the Gallery scoring section on the Scoring table by the Collector Lodge:
- the colour with the most Collectors (standing or lying) in the first, leftmost space;
- the colour with the second most next;
- the last two colours on the rightmost spaces.
Ties: the area next to the lower number on the Precedence tile goes first.
Scoring the Galleries
From the lowest region number to the highest, each region with a Gallery pays its Centerpiece owner, by the rank of the region’s colour:
| Gallery | 1st colour | 2nd colour | 3rd and 4th colours |
|---|---|---|---|
| Popular | 14 VP | 8 VP | 4 VP |
| Secondary | 7 VP | 4 VP | 2 VP |
- The Workshop that scores a Popular Gallery also takes the matching Popular Gallery tile — it can score at the end and breaks final ties.
- There are no Secondary Galleries in round 1.
Presence
A Workshop with Artwork in a Gallery region but no majority gains 1 Resource of the region’s colour. This is the only moment a team may choose together which teammate receives it.
Major Publicity
Starting with Create and going clockwise, compare the two Workshops’ Publicity at each Action: the
 Publicity on their cards there (Gossip cards included, now revealed) plus their
Publicity tokens.
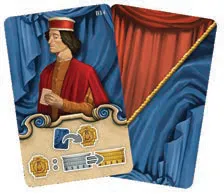
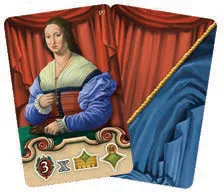
- The higher total takes the Benefactor or Patroness card from that Action and lays it face up in its play area.
- The loser takes a random Publicity token from the general supply, face up — unless it had 0 Publicity there.
- Ties: the Workshop farther on the Study track wins; on the same space, the one that got there first (marker underneath).
- If neither Workshop has any Publicity at that Action, the card goes back to the box.
Benefactor cards
One-time bonuses. Use one before or after your Main Action, then turn it face down. Cards with the Exhibition symbol are used at the start of the Exhibition phase instead (in turn order if both Workshops have one). Resources from Benefactor cards go to the active Character’s own section. All 14 are listed under Final Scoring and Cards.
Patroness cards
End-of-game scoring conditions — see Patroness cards.
Publicity tokens
Publicity tokens belong to the whole Workshop. When you play a card you may put 1 token from your supply on it: worth 2 Publicity if its colour matches the Action, 1 if not. Each token is used once and is discarded in the Cleanup phase.
Cleanup phase
Skip it in round 4. Otherwise, in order:
- In every Gallery region, the Workshop that scored it takes 1 of its Artworks back to its supply (Michelangelo picks either type). Check the majority again and swap the Centerpiece if needed — on a tie the same Workshop keeps it, unless a da Vinci Invention says otherwise.
- Return the Publicity tokens on the main board to the general supply, face down.
- Each Workshop takes back its cards from the main board and shuffles them with its discard pile: next round’s deck.
- Reveal a new Collector Setup card and stand the Collectors in the Lodge again.
- Swap every Popular Gallery token for a Secondary one.
- Turn 3 new Popular Gallery tiles face up and put a Popular Gallery token in each region they show.
- Each Workshop puts its Upgrade display cards at random under its Upgraded deck and deals a new display.
- Move the First Player marker one space clockwise and turn the Tools tile to point at it.
- Deal the next round’s patron cards, without looking, as in setup — from Create, clockwise.
Cards for the next round
| Round | Benefactor cards | Patroness cards |
|---|---|---|
| 1 (setup) | 3 | 1 |
| 2 | 2 | 2 |
| 3 | 1 | 3 |
| 4 | 0 | 4 |
| Benefactor (blue) | Patroness (red) |
|---|---|
 |  |