Developing Your Map
Developing Your Map for Sweet Lands.
Terrain and roads
When an Action or effect lets you place Terrain, take a tile matching the terrain shown on an empty Map Board hex. It must be adjacent to a Capital Hex or a Terrain Tile already on your map. A marked Special Terrain hex takes a Special Terrain Tile. Gain any printed placement bonus immediately. You cannot move or stack Terrain Tiles.
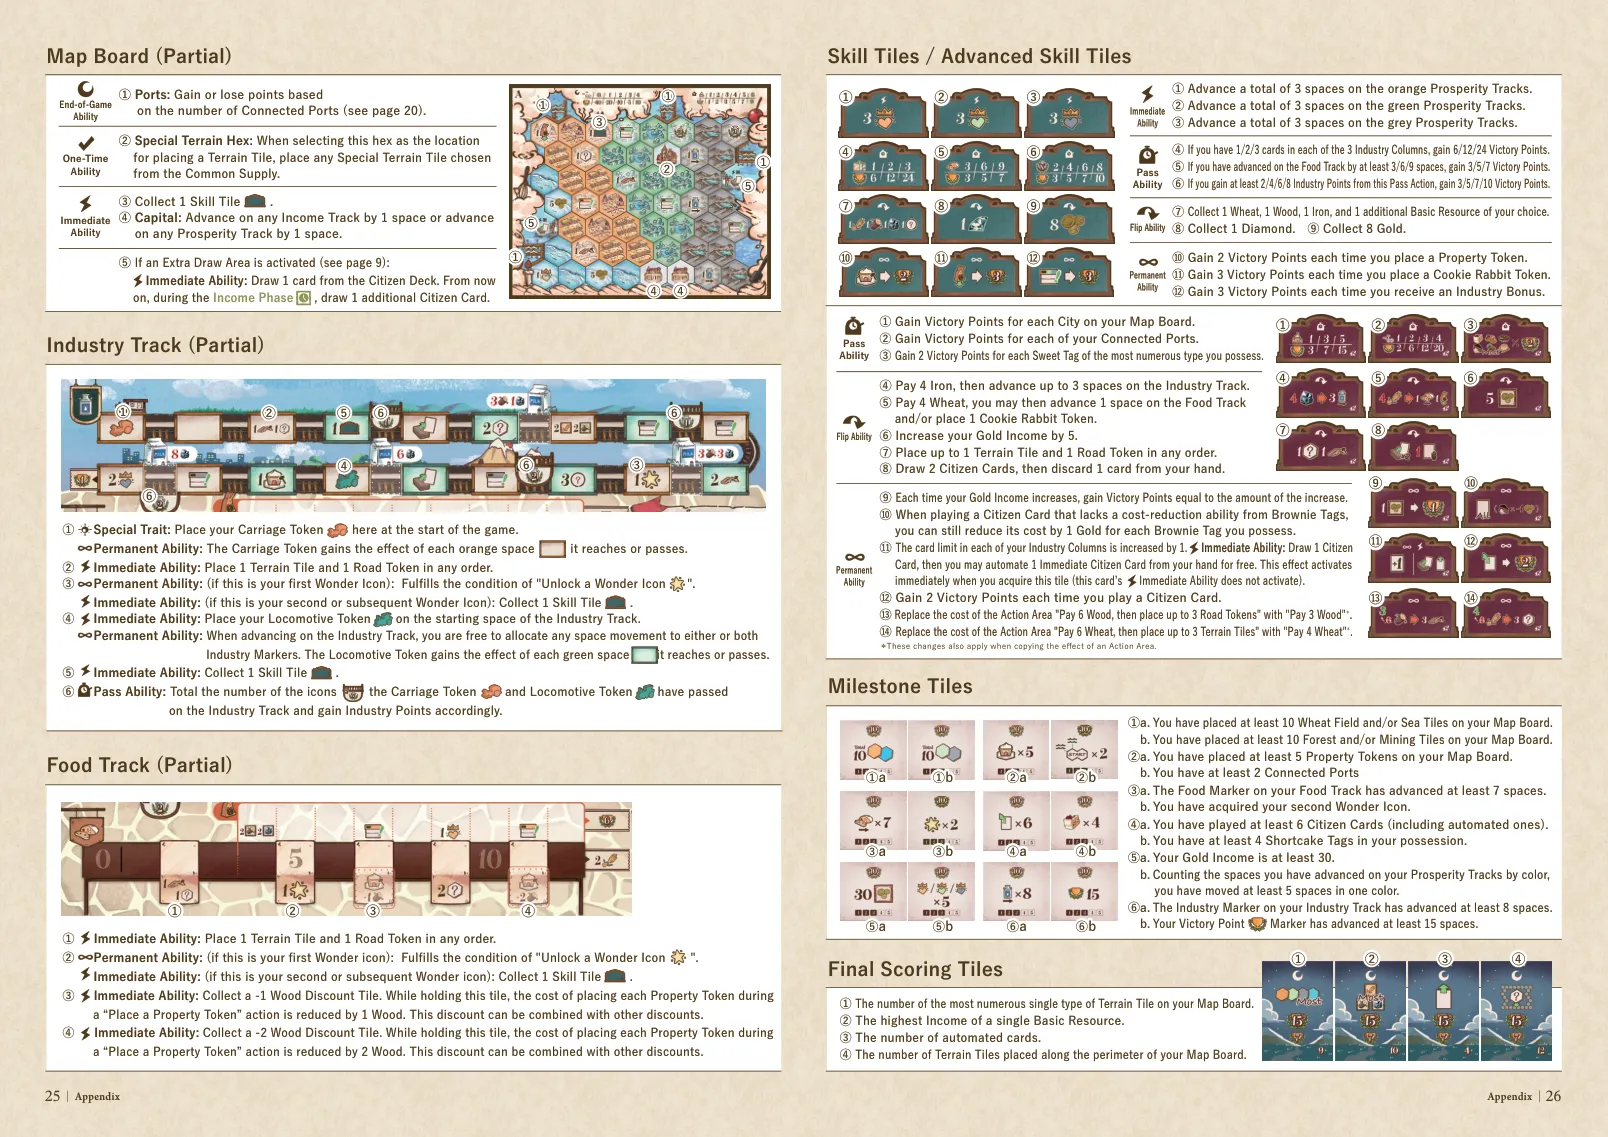
Place Road Tokens on open hex edges that touch a Capital edge or an existing Road. Resolve several roads one at a time; the new roads need not connect to one another. When one or more roads touch a Terrain Tile, flip it immediately and gain its reverse-side reward. A road can flip a tile even when you place the road before placing that tile.
Some Map Board spaces activate an Extra Draw Area when their adjacent terrain flips. Once active, draw one additional Citizen Card in each later Income Phase.
Properties
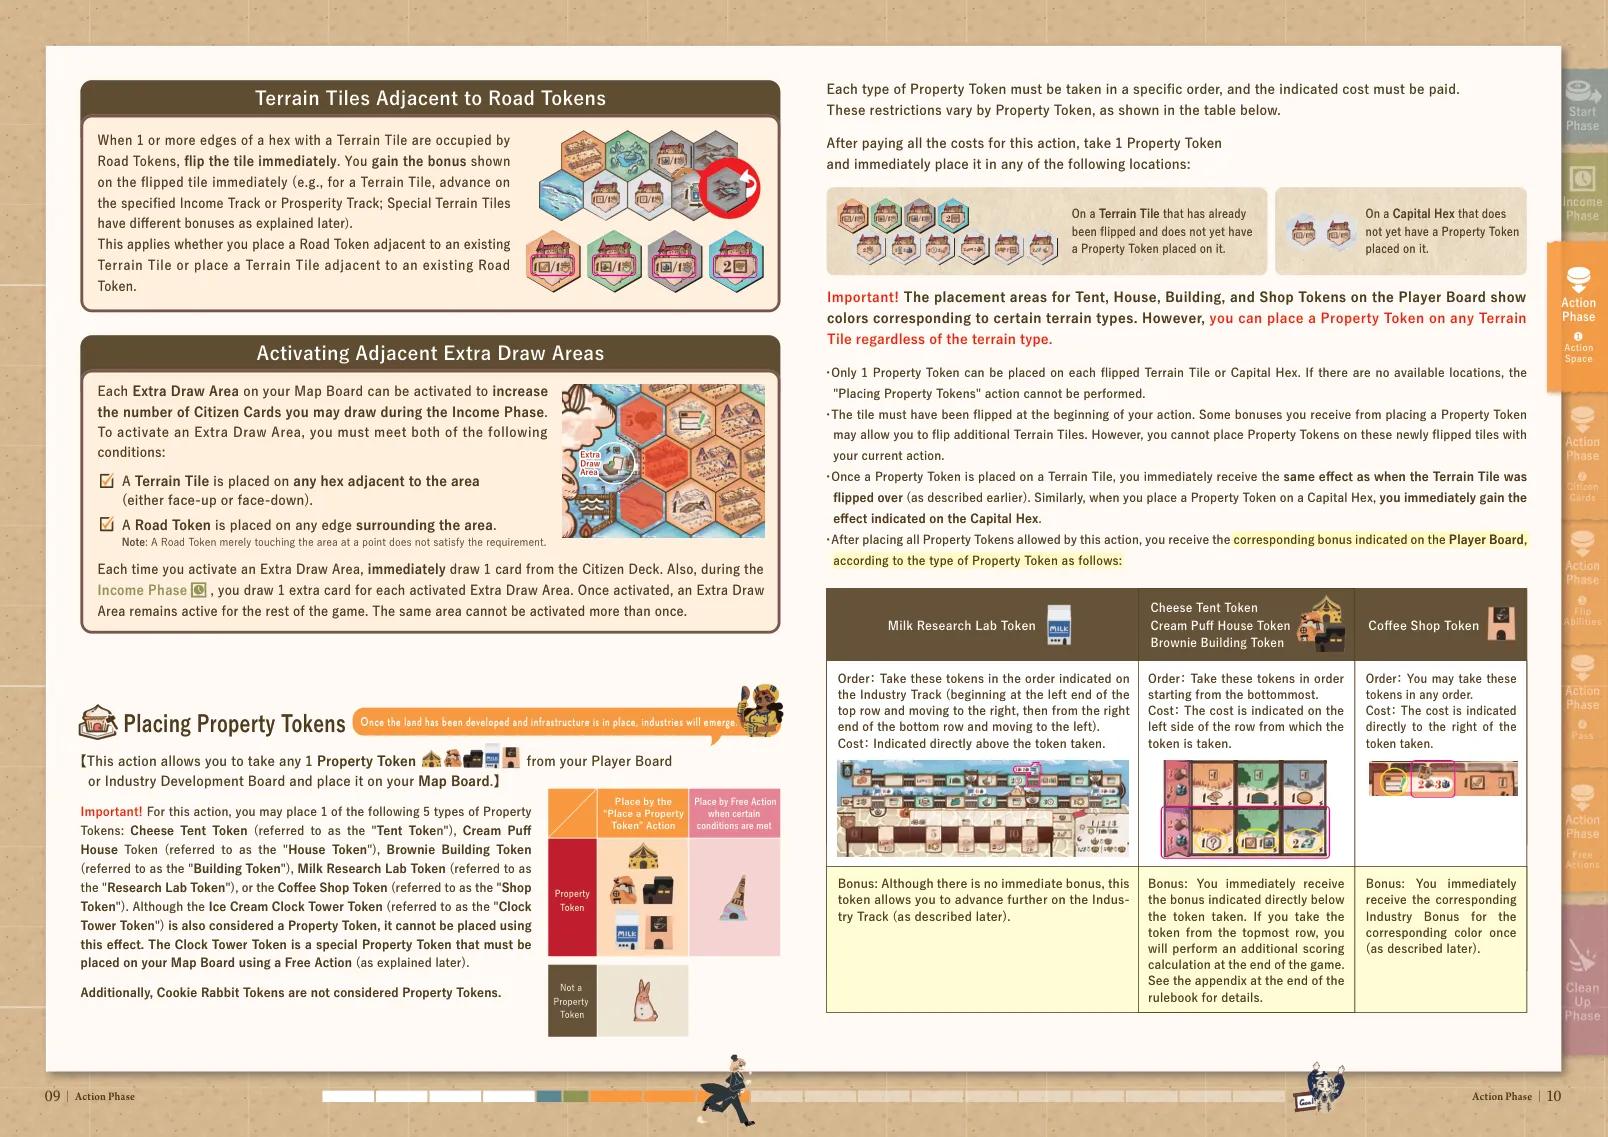
The Place Property action uses the costs and order shown above. Tents may be placed in any order; Houses and Buildings follow their displayed order. Research Labs follow the Industry Track order; Coffee Shops may be placed in any order. Properties may go on any eligible flipped terrain (the matching terrain colour on the Player Board is not a restriction) or an empty Capital Hex. A Clock Tower is a Property type, but is placed through its own conditions, not by the ordinary Place Property action. Each location holds one Property. A tile must already be flipped when the action begins; a tile flipped by a Property bonus cannot be used by that same action. Property placement bonuses resolve immediately.
Cities and points
A City is a continuously connected group of at least three different Property Token types. A Clock Tower counts as one type; a Cookie Rabbit does not. Once connected, a large City cannot be split. Connecting two Cities makes them one, which can reduce the City Point reward you earn when passing. On each pass, 1/2/3/4/5/6 Cities score 1/2/3/5/7/9 City Points respectively. Each City Point is worth two Victory Points at game end.
Food and Cookie Rabbits
Advance your Food Marker to collect rewards on spaces it lands on or passes. At spaces 7 and 11 take the corresponding Wood Discount Tile; its discount applies to future Property placements. If the marker has reached the final space, each extra advance gives two Wheat.
To place a Cookie Rabbit, take the leftmost available token on your Industry Development Board; your Food Marker must have reached its row. Place it on a Property in your map or a Capital with a Property, where there is no Rabbit already. Resolve the token’s bonus. If an effect gives you a Rabbit but none remain on your board, gain six Victory Points for each you could not place.
Industry and Prosperity
Advance the orange Carriage and green Locomotive on the Industry Track. Gain each bonus they reach or pass. Research Lab tokens can block a marker until the Lab is removed. If a marker is already at the end, extra movement earns one Victory Point per space.
Six Prosperity Tracks (two orange, two green, two grey) set end-game scoring rates for map development, Cookie Rabbits, roads, Properties, automated cards and Industry Points. Divide movement among eligible markers when an effect grants multiple spaces. Reaching a track’s last space costs one Diamond; only the first player to reach that space takes its large immediate bonus. Later players may pay one Diamond to reach it too.
Ports and Clock Towers
Connected Ports are scored by the printed map and final-scoring rules. A port must connect to a Capital through a continuous path of Terrain Tiles. The Clock Tower is placed when its shown conditions are met; it can count as a City type, and its character ability may change those conditions. Check your selected Character Board and the source diagram before placing it.