Modules and Solo
The Late-Game Factories and Common Goals modules, and the solo game against the Automa, in Nippon: Zaibatsu.
Both modules are for players who know the game, and they do the same job — use one of them, not both. Neither is used in the solo game.
Late-Game Factories
Six level-5 Factories that work like goals: the better you meet the condition on the tile, the more points, Resources or other benefits you gain from it. Build one early and it pays little; wait and another player may take it first.
Setup: add 3 / 4 / 5 random late-game Factories to the Factories on offer with 2 / 3 / 4 players (you may randomise their sides).
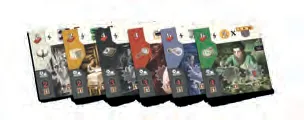
Common Goals
A Common Goals board and nine Common Goal tokens that make the game more competitive.
Setup: put the board left of the main board and 1 / 2 / 3 random Common Goals in each Period with 2 / 3 / 4 players. Use the side without numbers — the numbered side is for solo.
At the end of each Period, right after its Influence Scoring, each player gains a reward for every Common Goal of that Period they lead or share the lead in. In Periods I and II you choose any one of the rewards shown right of the board; in Period III each goal has its own reward.
| Goal | Who leads |
|---|---|
| Ships / Machines / Trains | most built |
| R&D / Mining / Finance | furthest along that track |
| Factories | most built |
| Contracts | most fulfilled |
| Influence | most Influence tokens in the Regions |
Solo mode
You play against the Automa, which runs a simplified rival zaibatsu. To win you must achieve every Solo Goal chosen for the game; then your score tells you how well you did.
Setup changes
Set up as for 2 players (see Setup with Solo selected): one set of Workers marks the four Regions, the other becomes the Automa’s Priority. You take one of 2 pairs of Starting tokens and always play first.
The Automa’s turn
You play your turns as usual. On the Automa’s turn:
- Reveal the top Action token and put it on the space to its right.
- Remove a Worker: return to the bag one Worker from the Hiring space matching the action on the token, choosing its colour by the Priority, left to right. A token with the Workers icon instead takes from the Hiring space with the most Workers — ties broken in the direction of the token’s arrow.
- Act: if the token shows the Trains or Local Markets icon, the Automa performs that action in a Region (Choosing a Region). A Workers token whose Worker came from above the Trains or Local Markets action also makes it act — but only if the token’s border colour is within the chosen difficulty (you have a Solo Goal on the space of that colour).
- If the pile is empty, reshuffle the Action tokens and the Priority Workers as in setup.
The Automa never takes the other actions: for them it only removes a Worker.
Choosing a Region
Go through the Regions in the order of the Priority:
- the Automa acts in the first Region where its Influence is equal to or less than yours and it can act there;
- if it leads in every Region where it could act, it acts in the first such Region;
- if it can act nowhere, it does nothing.
The Automa’s Trains
It places a Train on the topmost empty Train space of the Region. With no Trains left, nothing happens. Its Trains count 2 Influence each even without an Influence token there.
The Automa’s Local Markets
- It uses its Influence row for the current Period: bottom row (level-1 Goods) in Period I, middle (level 2) in Period II, top (level 3) in Period III. An empty row moves it to the next Period’s row, never back.
- It places its lowest token on a space of the Region matching either Good of that level — first replacing your highest token it can beat (strictly lower value), otherwise covering the highest printed value (an unprinted space counts as 0); the leftmost space breaks ties.
- It never replaces its own tokens. With no space it can use, it chooses another Region.
You may replace the Automa’s tokens as usual; replaced Automa tokens go back to the box. The 2-player limit of 2 tokens per Local Market applies.
Winning
Influence Scoring works as with 2 players. At the end, if you have not achieved every Solo Goal, you lose at once. Otherwise you win: make the Final Consolidation and Final Scoring, then read your title — 0+ Unessential, 150+ Forgettable, 180+ Significant, 210+ Brilliant, 240+ the Emperor’s favourite.