Cards & Components
Every tile and token of Nippon: Zaibatsu: all 60 Factory faces (both sides of the 24 standard and 6 late-game Factories), the 16 Starting tokens, Department tokens, Expert Workers, Contracts, Favor tokens, Demand tiles and the module tokens.
Every distinct face, grouped by type, with a link to the rule that uses it. Pictures come from the publisher’s rulebook and Player Handbook; the Starting tokens B from a public BoardGameGeek photo. Where no flat picture of a face exists, the row says check against the physical component.
Boards
To be added.
Cards
Contracts
Eight per player, the same set in each colour. Fulfilling one gives its Department bonus; the token then fills the next space at the bottom of your Zaibatsu, which the Contracts objective scores (Investment and Contracts). You need an empty Contracts space to fulfil one; a full Zaibatsu cannot take a seventh or eighth Contract. FAQ.
| Picture | Face |
|---|---|
 | Energy Department bonus. |
 | Prospection Department bonus. |
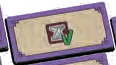 | Transportation Department bonus. |
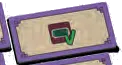 | Financial Department bonus. |
 | Innovation Department bonus. |
 | Foreign Affairs Department bonus. |
 | Lenses or Bento: fulfil only if Lenses or Bento Goods are among those spent in the action; any Department bonus. |
 | Bulbs or Clocks: fulfil only if Bulbs or Clocks Goods are among those spent in the action; any Department bonus. |
Tiles
Factory tiles
Each Factory tile is double-sided (A and B) and numbered: 1–4 are the 24 standard Factories, 5 the 6 late-game Factories of the Late-Game Factories module. Play side A in your first games. The picture is the effect strip printed on the tile: a lightning bolt marks an immediate effect, an action icon an action modifier, no icon a special effect (Factory effects). You may use only one Factory’s modifier per action (Action modifiers). Factory bonuses are free unless they print a cost; action modifiers apply to actions taken from the main board, not to other Factory effects. FAQ, FAQ, FAQ.
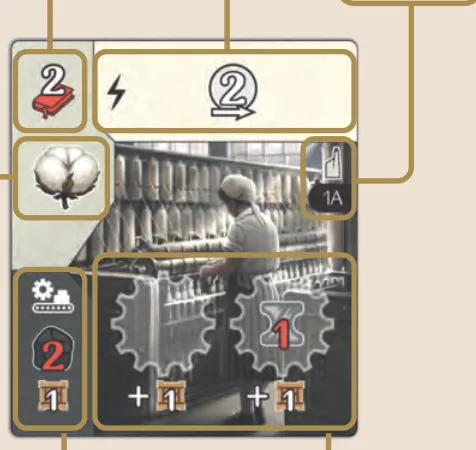
Cotton
Level 1, needs R&D 2, produces with 2  . Cotton leans to
 Silk and the R&D track.
| Picture | Face |
|---|---|
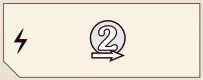 | 1A — immediate. 2 steps on the R&D track . |
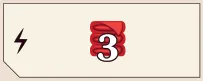 | 2A — immediate. Take 3 . |
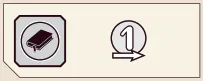 | 3A — R&D modifier. Each R&D action gives 1 more step on the R&D track. |
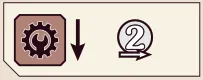 | 4A — Machines modifier. Each Machine  you build in this Factory gives 2 steps on the R&D track. |
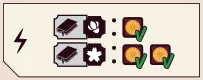 | 5A — immediate, late-game. 1 Yellow Department bonus if a level-2 Favor token sits on your R&D Personal Objective, 2 if it is level 3. |
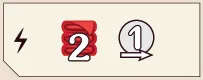 | 1B — immediate. Take 2 and 1 step on the R&D track. |
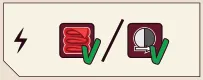 | 2B — immediate. A Red or a White Department bonus. |
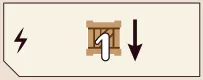 | 3B — immediate. Put 1  Goods cube in this Factory. |
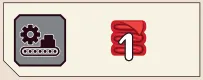 | 4B — Production modifier. Producing gives 1 . |
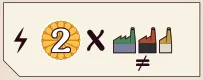 | 5B — immediate, late-game. 2  for each different Factory type you own. |
Paper
Level 1, needs R&D 2, produces with 2 . Paper leans to  Money and the Finance track.
| Picture | Face |
|---|---|
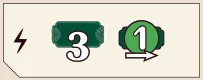 | 1A — immediate. Take 3 and 1 step on the Finance track . |
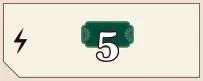 | 2A — immediate. Take 5 . |
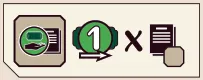 | 3A — Investment and Contracts modifier. 1 step on the Finance track for each Contract  you fulfil in that action. In Genro, Special Contracts do not count toward this bonus. FAQ. |
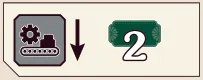 | 4A — Production modifier. 2 if you produce in this Factory. |
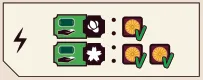 | 5A — immediate, late-game. 1 Yellow Department bonus with a level-2 Favor token on your Finance Personal Objective, 2 with level 3. |
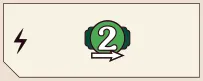 | 1B — immediate. 2 steps on the Finance track. |
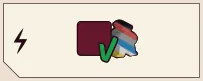 | 2B — immediate. The Department bonus of the colour of the Worker you used to build this Factory. |
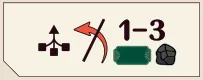 | 3B — special. At Consolidation step B keep up to 3 and in total instead of discarding them. The limit is their combined value, whatever coin denominations you use. FAQ. |
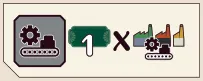 | 4B — Production modifier. 1 for each Factory you produce in during the action. |
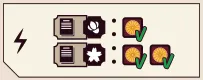 | 5B — immediate, late-game. 1 Yellow Department bonus with a level-2 Favor token on your Contracts Personal Objective, 2 with level 3. |
Bento
Level 2, needs R&D 4, produces with 3 . Bento leans to Coal and the Mining track.
| Picture | Face |
|---|---|
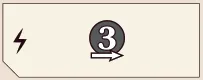 | 1A — immediate. 3 steps on the Mining track . |
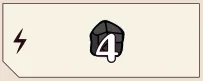 | 2A — immediate. Take 4 . |
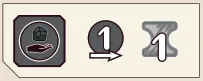 | 3A — Mining modifier. Each Mining action gives 1 more step on the Mining track and 1  . |
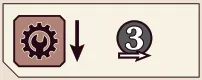 | 4A — Machines modifier. Each Machine you build in this Factory gives 3 steps on the Mining track. |
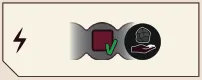 | 5A — immediate, late-game. Every Department bonus your Mining marker has reached or passed on the track. |
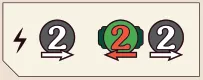 | 1B — immediate. 2 steps on the Mining track; you may also go back 2 on the Finance track for 2 more Mining steps. |
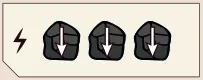 | 2B — immediate. Put 3 on this tile. Use them as usual; they are not discarded at Consolidation. |
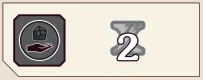 | 3B — Mining modifier. Each Mining action gives 2 . |
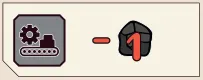 | 4B — Production modifier. Producing costs 1 less — once per action, not per activation. |
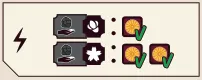 | 5B — immediate, late-game. 1 Yellow Department bonus with a level-2 Favor token on your Mining Personal Objective, 2 with level 3. |
Lenses
Level 2, needs R&D 4, produces with 3 . Lenses lean to Trains  .
Rulings that apply to every row below: When I have a factory bonus stating “Build 1 Machine” or “Build 1 Train,” do I need to pay resources for these?.
| Picture | Face |
|---|---|
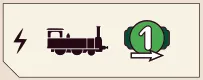 | 1A — immediate. Build 1 Train and 1 step on the Finance track.. |
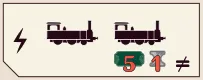 | 2A — immediate. Build 1 Train; you may then spend 5 and 1 for another Train in a different Region.. |
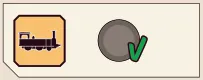 | 3A — Trains modifier. The Region bonus of one Region where you built a Train in that action (Trains). Even if you build several Trains, choose only one Region for this bonus. FAQ. |
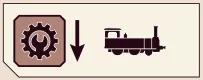 | 4A — Machines modifier. Each Machine you build in this Factory also builds 1 Train. It triggers only when you take the Machines action from the main board, not when another effect places a Machine. FAQ. |
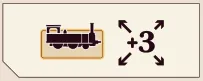 | 5A — special, late-game. Each of your Trains counts as 3 Influence instead of 2 (Influence Scoring). |
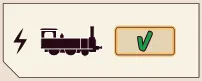 | 1B — immediate. Build 1 Train and take the bonus of its space twice.. |
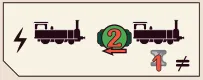 | 2B — immediate. Build 1 Train; you may then go back 2 on the Finance track and spend 1 for another Train in a different Region.. |
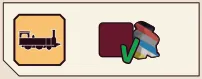 | 3B — Trains modifier. After at least one activation of the Train action, gain the Department bonus matching the Worker used for that action. This modifier does not build a Train; the immediate Train-building effect is Lenses 2B. FAQ clarification. |
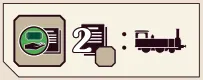 | 4B — Investment and Contracts modifier. Build 1 Train if you fulfil at least 2 Contracts in that action.. |
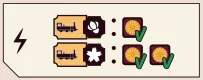 | 5B — immediate, late-game. 1 Yellow Department bonus with a level-2 Favor token on your Trains Personal Objective, 2 with level 3. |
Bulbs
Level 3, needs R&D 6, produces with 4 . Bulbs lean to Machines and Iron.
| Picture | Face |
|---|---|
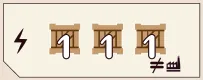 | 1A — immediate. Put 1 in each of 3 different Factories (the Old Factory counts). |
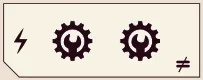 | 2A — immediate. Build 1 Machine in each of 2 different Factories. Each placement still pays any cost shown on its Machine space; these placements do not trigger action modifiers such as Lenses 4A. FAQ, FAQ. FAQ. |
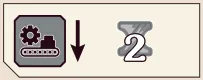 | 3A — Production modifier. 2 if you produce in this Factory. |
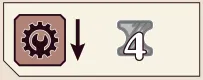 | 4A — Machines modifier. Each Machine you build in this Factory gives 4 . |
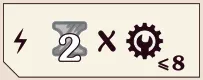 | 5A — immediate, late-game. 2 for each Machine you have built, at most 8. |
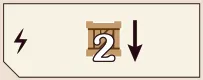 | 1B — immediate. Put 2 in this Factory. |
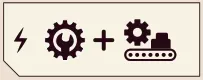 | 2B — immediate. Build 1 Machine; you may then produce in that Factory. The FAQ says the production likely uses its normal Coal cost; the rulebook does not explicitly settle this. FAQ. FAQ. |
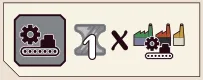 | 3B — Production modifier. 1 for each Factory you produce in during the action. |
 | 4B — Investment and Contracts modifier. Build 1 Machine if you fulfil at least 1 Contract in that action. FAQ. |
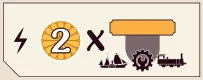 | 5B — immediate, late-game. 2 for each scoring threshold you have reached in the Ships, Machines and Trains area — lower and higher both count, up to 12. |
Clocks
Level 3, needs R&D 6, produces with 4 . Clocks lean to Ships  and the Finance track.
| Picture | Face |
|---|---|
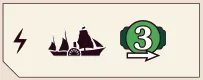 | 1A — immediate. Build 1 Ship and 3 steps on the Finance track. |
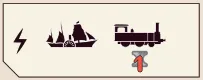 | 2A — immediate. Build 1 Ship; you may then spend 1 to build 1 Train. FAQ. |
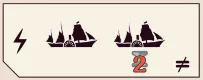 | 3A — immediate. Build 1 Ship; you may then spend 2 for another Ship to a different Destination (Ships). |
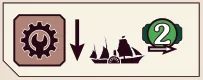 | 4A — Machines modifier. Each Machine you build in this Factory also builds 1 Ship and gives 2 steps on the Finance track. |
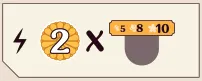 | 5A — immediate, late-game. 2 for each lower scoring threshold you have reached — Factories and Contracts don’t count — up to 12. |
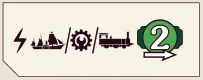 | 1B — immediate. Build a Ship, a Machine or a Train, then 2 steps on the Finance track. |
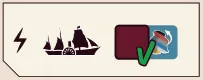 | 2B — immediate. Build 1 Ship and gain the Department bonus of the colour of the Expert Worker you take. |
 | 3B — immediate. Build 1 Ship; you may then go back 3 on the Finance track for another Ship to a different Destination. |
 | 4B — Investment and Contracts modifier. Build 1 Ship if you fulfil at least 1 Contract in that action. |
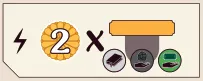 | 5B — immediate, late-game. 2 for each scoring threshold you have reached in the R&D, Mining and Finance area — lower and higher both count, up to 12. |
Demand tiles
Nine tiles; eight go on the City spaces at random angles and one goes back in the box. Each side shows the Goods the Local Market on that side of the City buys (Local Markets). The tiles differ only in which four Goods they show and in what order: the rulebook pictures them overlapping, so check each tile’s sides against the physical component.
| Picture | Face |
|---|---|
 | 9 Demand tiles, each with four Goods types, one per side. |
Tokens & pieces
Starting tokens
At setup each player takes one pair: token A gives an effect and your starting score (the number), token B gives Resources, Money and track steps (Setup).
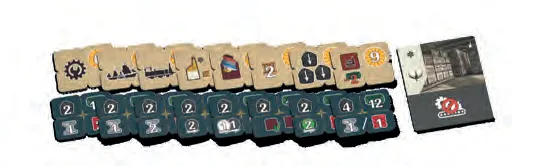
Starting tokens A
| Picture | Face |
|---|---|
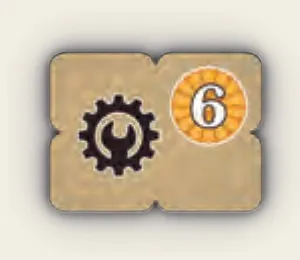 | Machine, start on 6 . Take your leftmost Machine; it goes on the first space of the first Factory you build. Placing it as this setup bonus does not count as taking the Machines action or trigger Factory modifiers. FAQ. |
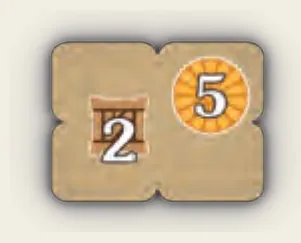 | 2 Goods, start on 5. Take 2 ; they go in the first Factory you build. Until you assign them to a Factory, they have no good type and cannot be spent. FAQ. |
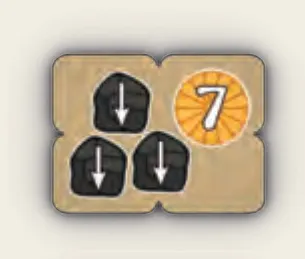 | 3 Coal, start on 7. Put 3 on the token; use them as usual, they are not discarded at Consolidation. This is a one-time starting bonus, not a reusable action. FAQ. |
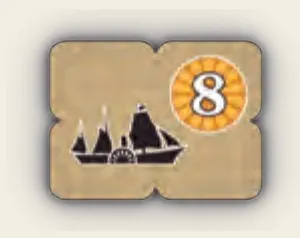 | Ship, start on 8. Build 1 Ship, taking its Expert Worker and Upgraded Department token as usual (Ships). The starting bonus is free. FAQ. |
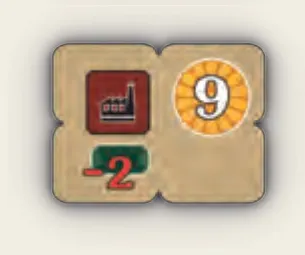 | Factory discount, start on 9. Every Factory you build with the Factory action costs 2 less; this discount lasts for the whole game. FAQ. |
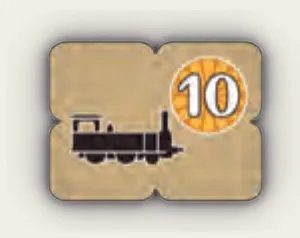 | Train, start on 10. Build 1 Train and take its space’s bonus (Trains). The starting bonus is free; resolve the starting bonuses before spending any resources they provide. FAQ, FAQ. |
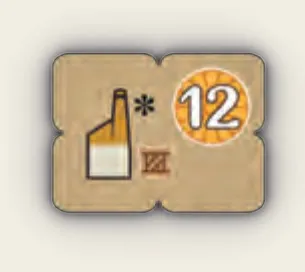 | Old Factory, start on 12. Take the Old Factory tile, below. FAQ. |
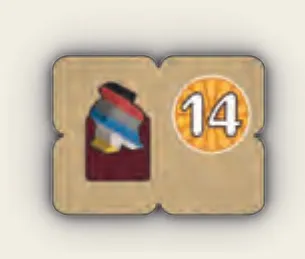 | Worker, start on 14. Draw a Worker of your choice from the bag onto the lowest space of your Workers area. |
| Picture | Face |
|---|---|
 | Old Factory. Goes on your first Factory space, Paper or Cotton side up, with 1 below it. It never produces, but effects may put Goods there (Bulbs 1A); goods cannot be moved into it from another Factory. FAQ. |
Starting tokens B
Every B token gives Coal and Money; the rest differs. Pictures from a public top-down BoardGameGeek photo of all eight (the rulebook pictures only five of them).
| Picture | Face |
|---|---|
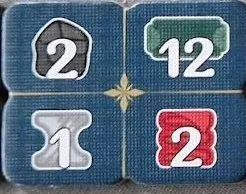 | 2 , 12 , 1 , 2 . |
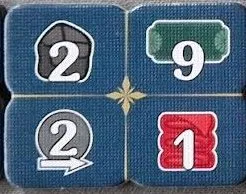 | 2 , 9 , 2 steps on the Mining track, 1 . |
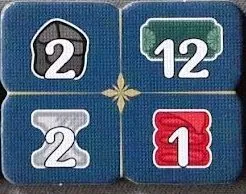 | 2 , 12 , 2 , 1 . |
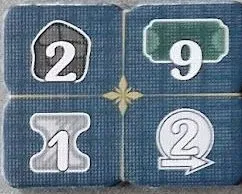 | 2 , 9 , 1 , 2 steps on the R&D track. |
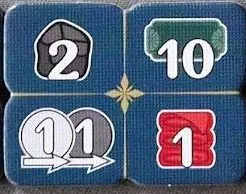 | 2 , 10 , 1 step each on the R&D and Mining tracks, 1 . |
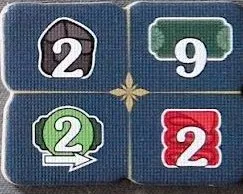 | 2 , 9 , 2 steps on the Finance track, 2 . |
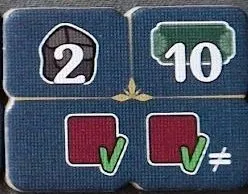 | 2 , 10 and two Department bonuses of your choice, which must differ (the “≠” beside the second). |
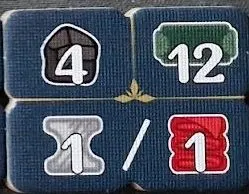 | 4 , 12 and 1 or 1 . |
Upgraded Department tokens
24 tokens, the same six Departments repeated. A Ship takes the one at its Destination; from then on that Department’s bonus is the upgraded amount (Department bonuses). The bonus unlocks as soon as your total Ships, Trains and Machines reaches a threshold. When a Ship unlocks it, you may resolve the bonus before placing the Expert Worker. Solo uses the 2-player setup, but the number of tokens you stack does not matter because the Automa does not take them. FAQ, FAQ, FAQ.
| Picture | Face |
|---|---|
 | Energy (black): 3 instead of 2. |
 | Prospection (red): 3 instead of 2. |
 | Transportation (grey): 3 instead of 2. |
 | Financial (blue): 5 instead of 3. |
 | Innovation (white): 2 track steps instead of 1 — both on R&D or Mining, or one on each. |
 | Foreign Affairs (yellow): 4 instead of 2. |
Expert Workers
Six, one per colour, waiting at the Destinations of the Iwakura Mission. The Ship you send there brings the Expert to your Workers area; it counts as a Worker of its colour and returns to its Destination at Consolidation (Ships, Salaries). You need room to place the Expert Worker before you can build a Ship to that Destination. A later Ship to the same Destination returns that Worker to you again, but gives no second Department token. FAQ, FAQ, FAQ, FAQ.
| Picture | Face |
|---|---|
 | Black — Energy. |
 | Red — Prospection. |
 | Blue — Financial. |
 | Grey — Transportation. |
 | Yellow — Foreign Affairs. |
 | White — Innovation. |
Favor tokens
Nine per player, in three levels. At Consolidation the topmost Worker (4th, 5th or 6th) shows which level you may take; place it on a Personal Objective, where it multiplies that objective’s score (Favor token, Personal Objectives). You take the token beside your topmost Worker; with only three Workers, you get one only if a token is beside that Worker. FAQ.
| Picture | Face |
|---|---|
 | Level 1 (a bud) — 4 Workers. Worth 5 / 10 on a track or fleet objective. |
 | Level 2 (a seed) — 5 Workers. Worth 8 / 16. |
 | Level 3 (a cherry blossom) — 6 Workers. Worth 10 / 20. |
Module and solo tokens
| Picture | Face |
|---|---|
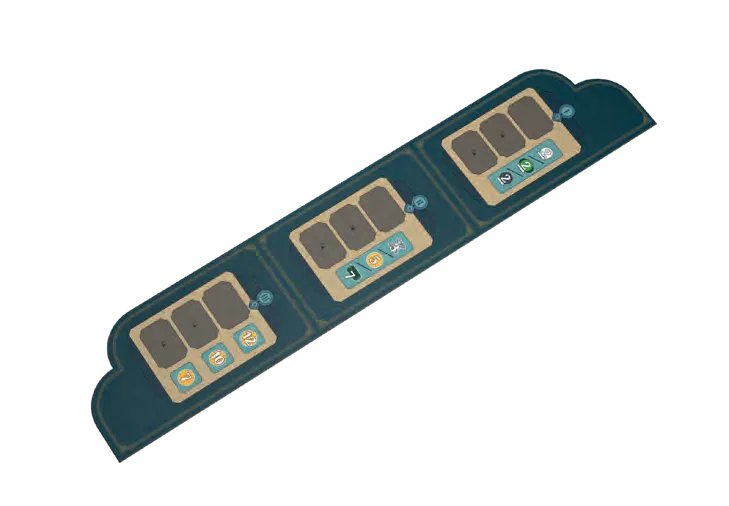 | Common Goal tokens (9): most Ships , Machines or Trains ; farthest on R&D , Mining or Finance ; most Factories  ; most Contracts ; most Influence tokens on the board (Common Goals). In periods I and II, you take one reward for each goal where you lead or tie; in period III, each goal has its own fixed reward. “Most Influence tokens” counts pieces across all regions, not Trains. FAQ, FAQ, FAQ. |
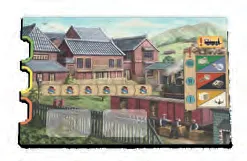 | Solo Goal tokens (9, the backs of the Common Goals): the same nine goals with a number to reach by the end; 1 / 2 / 3 of them for Easy / Normal / Hard (Solo mode). For a goal requiring 6 Influence, count 6 tokens across all regions combined. Only two faces are pictured — check the numbers against the physical component. FAQ. |
| Automa Action tokens (9): each shows an action — or the Workers icon — with a border colour for the difficulty it plays at (The Automa’s turn). A left arrow takes the leftmost Worker from the section with the most; a right arrow takes its rightmost. The rulebook shows two; check the rest against the physical component. FAQ, FAQ, FAQ. |
Icons
To be added.