Teach the Game
Grow a civilization, choose its patron saint and win before the land is exhausted.
How you win
“Your medieval civilization needs workers, food and room to grow. Choose a patron saint to decide what counts as victory, then achieve that goal before famine and pollution overwhelm your cities.”
Build Houses to release workers. Staff city buildings to unlock actions, send workers into the countryside to produce goods, and use those goods to expand. A Cathedral chooses your saint and its special ability. There are no victory points and no fixed number of rounds.
The boards
Everyone shares the countryside. Your own city maps are grids into which building tiles must fit. The first city has a 7×7 grid; later ones have 6×6 grids. Buildings in any of your cities serve your whole civilization.
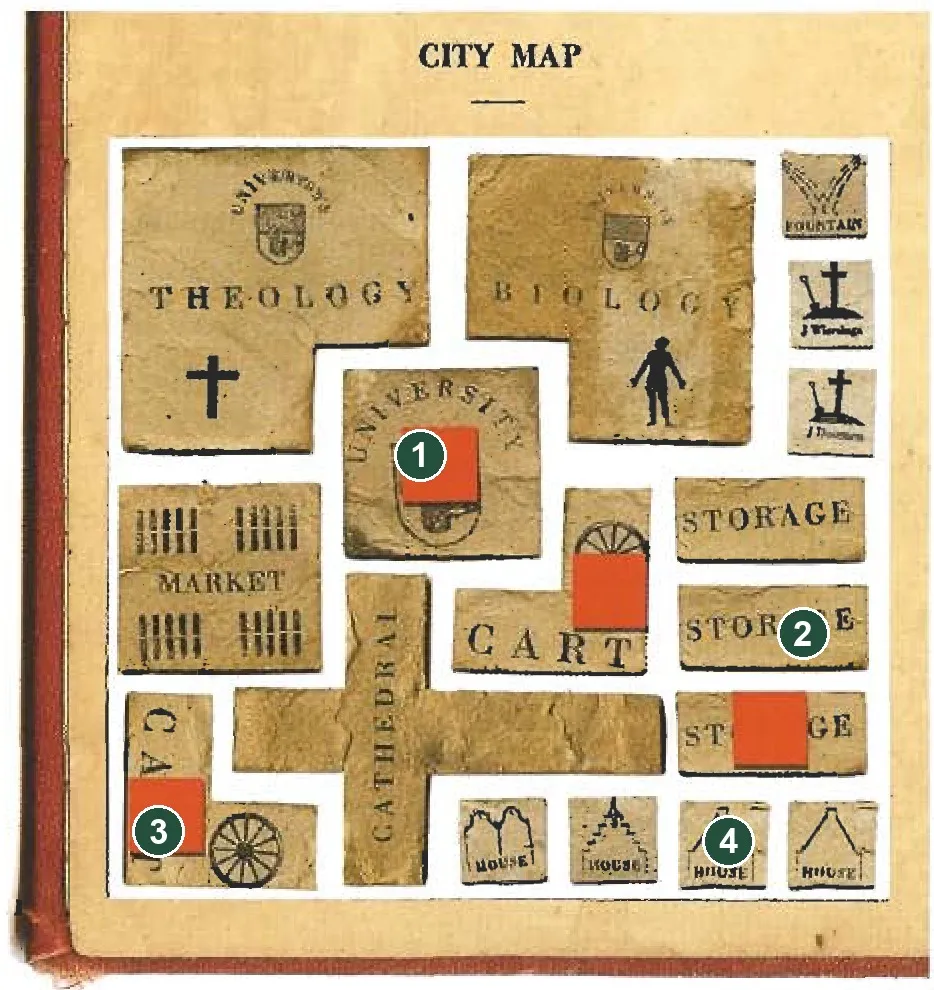
- University and adjacent Faculties: one worker can run the connected group.
- Stores: retain old goods when the storage check arrives.
- Cart Shops: each staffed shop builds one countryside producer, Inn or city.
- Houses: each built House releases one worker.
A round
Follow the ten phases. First recover city workers, then secretly build and staff your cities. Determine turn order, build in the countryside, store leftover goods, harvest, explore, resolve famine and pollution, and check victory. Countryside workers return only when their production site is exhausted.
The storage check comes before the new harvest. Food protects against famine without being spent. A new city increases your pollution immediately.
How the game ends
Check victory together in phase 10. You need your Cathedral and your saint’s condition. If several players qualify, compare unpolluted hexes within their current zones of control. A player who cannot place a required grave is eliminated.
[Intro] The Introductory Game omits Famine and Pollution, keeping the other phases and saint goals.
Ways to score
Antiquity uses conditions instead of points:
| Saint | What wins |
|---|---|
| San Nicolo | Have all 20 workers released through Houses. |
| Santa Barbara | Have one functional, grave-free city building of each type, including a House but excluding graves. |
| San Christofori | Own 3 of each food and luxury, 24 goods in all. Wood and stone do not count. |
| San Giorgio | Include every hex of one opponent’s zone of control in your own. |
| Santa Maria | Meet any two of the other saints’ conditions together. |
What each resource is for
Wood and stone buy buildings; wood also starts Woodcutters, Mines and Fisheries. Food buys Houses and Inns and protects against famine. Luxuries buy advanced buildings and Houses. Workers run buildings and remain committed to producers. Space is also a resource: graves block city squares, while pollution blocks new producers in the countryside.
Where to get each thing
| You need | Where it comes from |
|---|---|
Wood  | A Woodcutter started for 1 wood on unpolluted forest. Keep a way to obtain more. |
Stone  or gold  | A Mine started for 1 wood on unpolluted mountain. The first Mine fixes the entire mountain range’s good. |
Grain  , olives  , sheep  , wine  | A matching seeded Farm on unpolluted grass. A staffed Biology Faculty waives one Farm’s seed each turn. Exploration can supply these goods. |
Fish  , dye  , pearls  | A coastal Fishery, started for 1 wood. Each Fishery chooses one good. San Giorgio also gains fish for Cathedrals built that turn. |
| Any good | A staffed Market trades any two goods for one with the supply; player trades need a staffed Market on at least one side. |
| Workers | Build Houses in the City Building phase. The first four cost nothing; later Houses need food and sometimes luxuries. |
| More reach | Inns, Harbour and Stables. A new city also adds a new origin for reach. |
| Fewer graves or less pollution | Granary, food, Hospital, Fountains, Dump and Alchemy, each at its own timing. |
Teaching tips
Show a House releasing a worker, a Cart Shop sending that worker to a producer, and that producer’s first harvest. Then explain why storage happens before harvest. Demonstrate one wood cycle and one food cycle before listing advanced buildings. Teach all five saints before players choose a Cathedral, with particular attention to Santa Barbara’s functional buildings and San Giorgio’s complete zone containment.